Fruit Pie Fillings for Home Canning
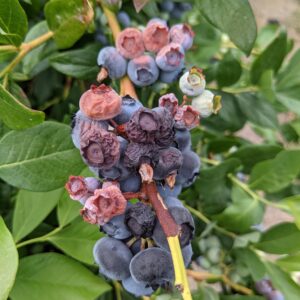
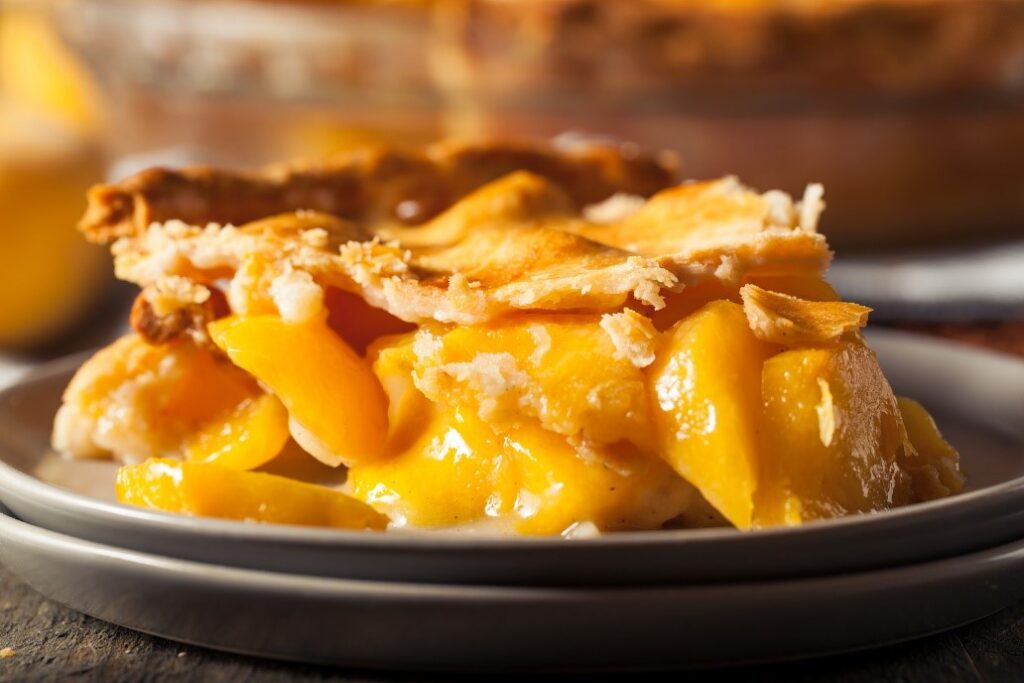
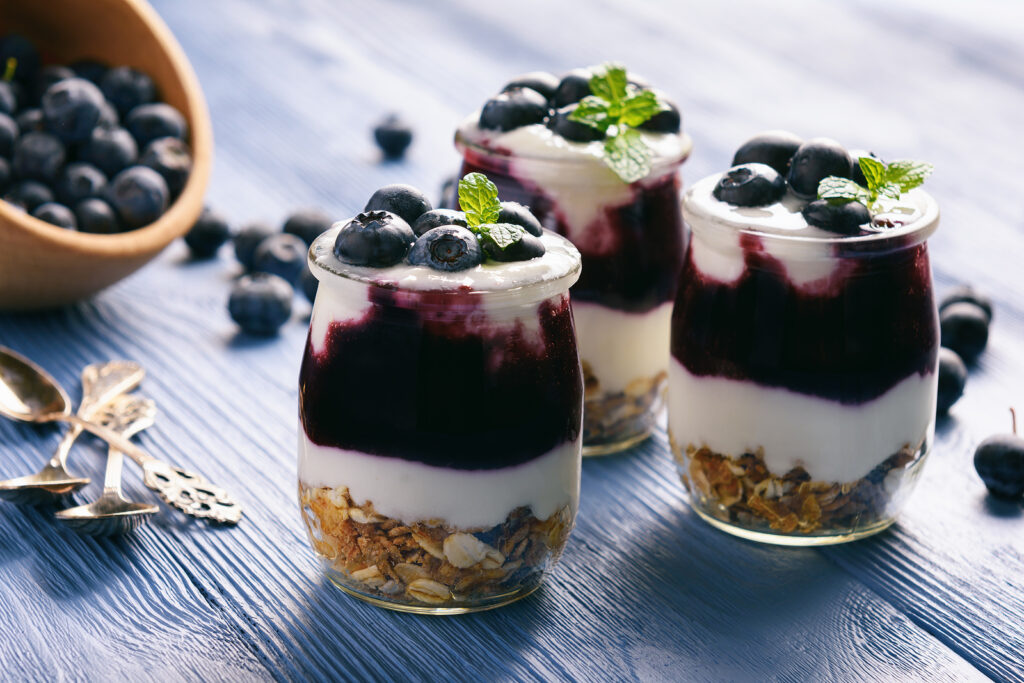
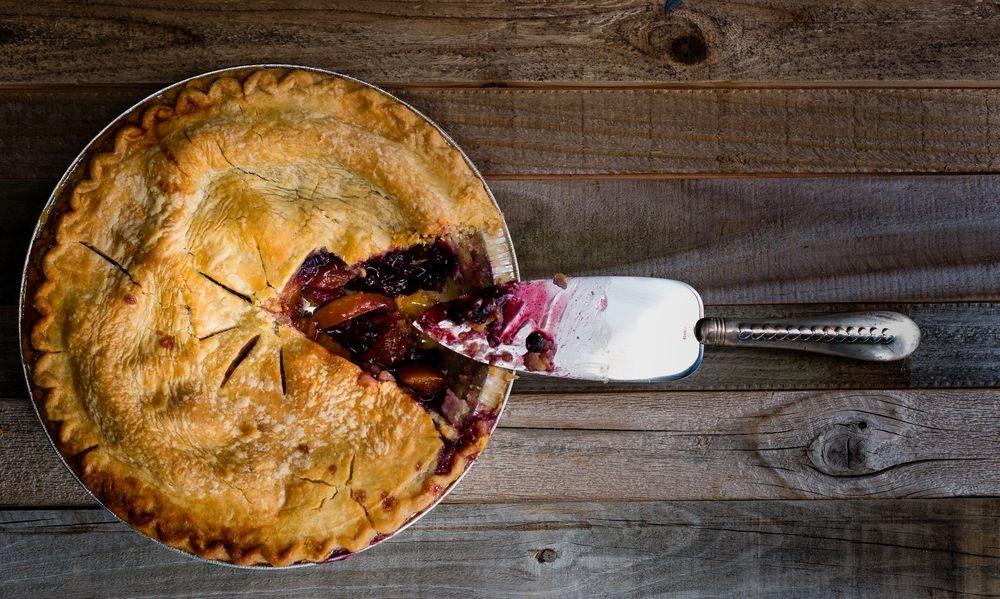
Home canned fruit pie fillings make it easy to prepare delicious pies and dessert all year long. The recipes in this publication have been specifically developed for home canning and, when followed, will produce a product that tastes good and is shelf-stable and safe. In this publication, you will find instructions for making apple, blueberry, cherry, and peach pie fillings. A one-quart jar of the filling will make a single eight- to nine-inch pie. The canned fruit fillings can also be used as toppings for desserts or pastries, or for making fruit cobblers or crisps (Figure 1 and Figure 6).
Preparation Guidelines
Thickening Pie Fillings
The recipes in this publication use the thickener Clear Jel, also known as Clear Jel A. Clear Jel is a modified starch-based thickener that produces a smooth and clear sauce with little or no aftertaste (Figure 2). The sauce holds up to heat processing and does not break down in acid food mixtures. Unlike other starches, sauces made with Clear Jel do not separate or thicken too much during the canning process (Figure 3).
There are two types of Clear Jel: traditional and instant. The traditional (cook-type) Clear Jel is used to prepare the pie filling recipes. The instant Clear Jel cannot be substituted in the preparation of the recipes in this publication. The instant form thickens without heating and is designed for use in products that will not be cooked.
Make sure you have Clear Jel available before beginning the preparation of your pie fillings for canning.
Purchasing Clear Jel
Clear Jel is not available in most grocery stores. It can be purchased through local health food stores, in specialty food shops, or online. Check with your local Extension office for sources of Clear Jel in your community. In some areas, mail order will be your only option.
One pound of Clear Jel contains about three cups. The fruit pie filling recipes in this publication call for between 1½ to 2¼ cups of Clear Jel to prepare 7 quart jars of pie filling.
If you cannot find Clear Jel, another option is to can the pie filling without any thickener and then thicken it with tapioca or cornstarch before putting it into the pie shell.
SAFETY ALERT: Pie fillings thickened with starches other than Clear Jel, such as flour, cornstarch, or tapioca, are not safe for canning. The heat penetration of these products is poor, and this may interfere with the destruction of bacteria during the canning process. In addition, these thickeners tend to clump and produce a filling that is inconsistent in texture, creating thin and watery parts and overly thick parts. Discard any canning recipes that call for other thickeners and replace them with the recipes in this publication.
Recipe Adjustments
Sugar and spices. It is safe to change the amount of sugar or spices in these pie filling recipes. The flavor of your pie fillings will vary depending on the variety of fruit used to prepare the recipe. To be sure you are preparing a product you will enjoy, consider making a trial batch of the pie filling recipe. Instructions for preparing a single quart jar of pie filling is included with each recipe. This provides the opportunity to make a sample jar, bake a pie, and serve it. You can then adjust the sugar and spices in the recipe to suit your tastes. These recipes have not been tested for use with alternative sweeteners.
Lemon juice. Bottled lemon juice should be used to prepare these recipes. Do not adjust the amount of lemon juice in these recipes. Lemon juice is necessary for safety and enhances the stability of the filling during storage. It is not safe to reduce the amount of lemon juice called for in these instructions.
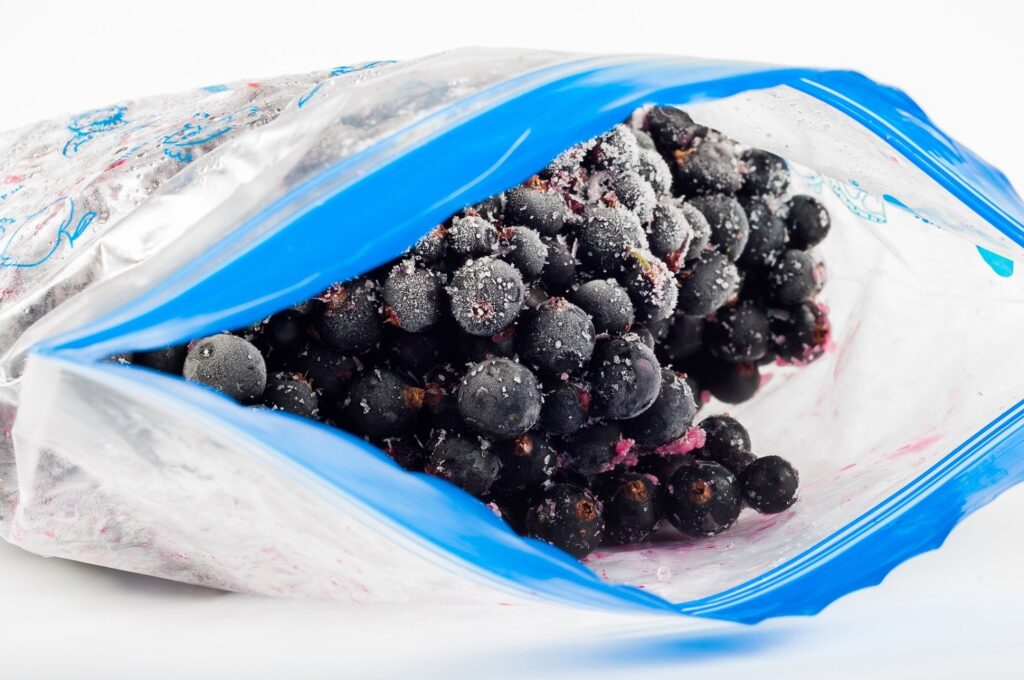
Preparation with frozen fruit. Frozen cherries or blueberries can be used to prepare these pie filling recipes (Figure 4). Begin with unsweetened fruit. If sugar has been added to the frozen fruit, rinse it off while the fruit is still frozen or adjust the amount of sugar added during preparation. Collect, measure, and use juice from thawing fruit to replace the water specified in the recipe and reduce Clear Jel to ¼ cup for a quart and 1¾ cups for 7 quarts. Fresh fruit is recommended for the apple and peach pie filling recipes.
Apple Pie Filling
Quantities of ingredients needed for one quart and seven quarts of apple pie filling.| Ingredients | 1 Quart | 7 Quarts |
|---|---|---|
| Blanched, sliced, fresh apples | 3½ cups | 6 quarts |
| Granulated sugar | ¾ cup + 2 tablespoons | 5½ cups |
| Clear Jel | ¼ cup | 1½ cups |
| Cinnamon | ½ teaspoon | 1 tablespoon |
| Cold water | ½ cup | 2½ cups |
| Apple juice | ¾ cup | 5 cups |
| Bottled lemon juice | 2 tablespoons | ¾ cup |
| Nutmeg (optional) | ⅛ teaspoon | 1 teaspoon |
| Yellow food coloring (optional) | 1 drop | 7 drops |
Yield: 1 quart or 7 quarts.
Quality: Select firm, crisp apples. If apples lack tartness, use an additional ¼ cup of lemon juice when preparing the 7-quart recipe.
Procedure: Wash, peel, and core apples. Cut ½-inch wide slices. To prevent browning, place in water containing 1 teaspoon ascorbic acid per gallon of water.
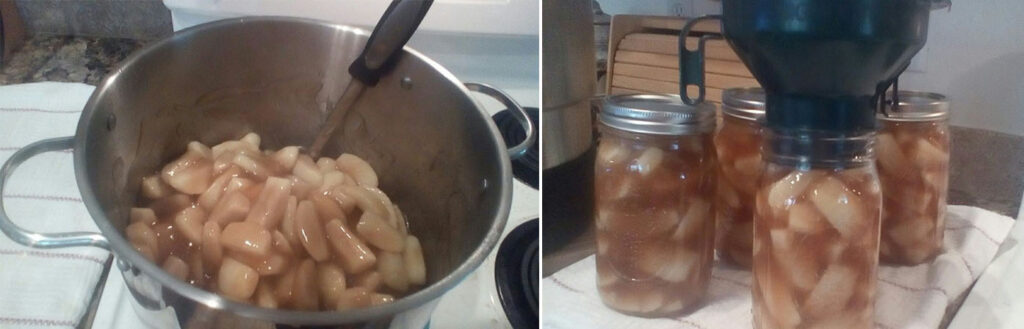
To prepare fruit, work in batches of no more than 6 cups of fruit at a time. In large pot, heat 1 gallon of water to boiling. Place fruit into boiling water. Bring back to boil and boil 1 minute. Remove fruit from water. Drain, but keep warm in a covered bowl or pot. Repeat until all fruit is blanched. In separate pot, combine sugar, Clear Jel, and cinnamon. Stir to blend. Add water and apple juice and mix thoroughly. Add food coloring and nutmeg, if desired. Stir and cook on medium high heat until mixture thickens and begins to bubble. Add lemon juice and boil 1 minute, stirring constantly. Remove from heat and fold in drained apple slices. Fill hot jars with mixture, leaving 1-inch headspace. Wipe jar rims. Adjust lids and rings according to manufacturer’s instructions. Process immediately in boiling water canner, adjusting for elevation, if needed. Once processing is complete, turn off heat, remove canner lid, and wait 5 minutes before removing jars. Increase wait time to 10 minutes to reduce siphoning/oozing. Let cool, undisturbed, for 12 to 24 hours and check for seals.
Recommended processing times for apple pie filling in a boiling water canner at various altitudes.| Style of Pack | Jar Size | 0–1,000 ft | 1,001–3,000 ft | 3,001–6,000 ft | Above 6,000 ft |
|---|---|---|---|---|---|
| Hot | Pints or quarts | 25 min | 30 min | 35 min | 40 min |
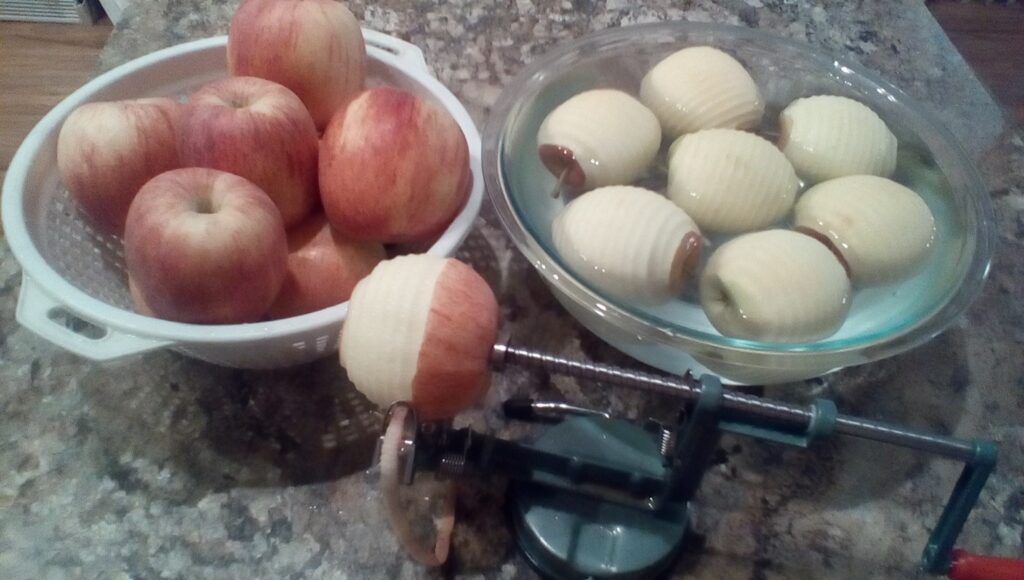
Preparation Tip: Peeling Apples
The fastest way to peel apples is with a peeler (Figure 5). With firm apples, it takes about 20 seconds per apple. Apple peelers don’t work well on soft, mushy apples or apples with soft spots on them.
Blueberry Pie Filling
Quantities of ingredients needed for one quart and seven quarts of blueberry pie filling.| Ingredients | 1 Quart | 7 Quarts |
|---|---|---|
| Fresh or thawed blueberries | 3½ cups | 6 quarts |
| Granulated sugar | ¾ cup + 2 tablespoons | 6 cups |
| Clear Jel | ¼ cup + 1 tablespoon | 2¼ cups |
| Cold water | 1 cup | 7 cups |
| Bottled lemon juice | 3½ teaspoons | ½ cup |
| Blue food coloring (optional) | 3 drops | 20 drops |
| Red food coloring (optional) | 1 drop | 7 drops |
Yield: 1 quart or 7 quarts.
Quality: Select fresh, ripe, and firm blueberries. Unsweetened, frozen blueberries may be used. If sugar has been added to frozen berries, rinse it off while fruit is still frozen.
Procedure: Wash and drain fresh blueberries. Allow frozen blueberries to thaw.
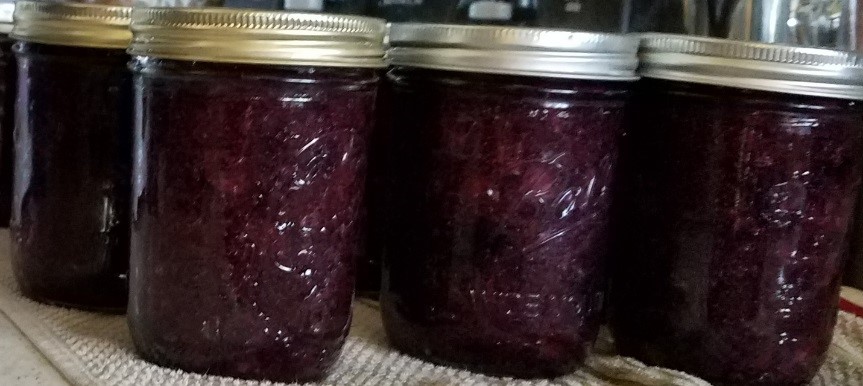
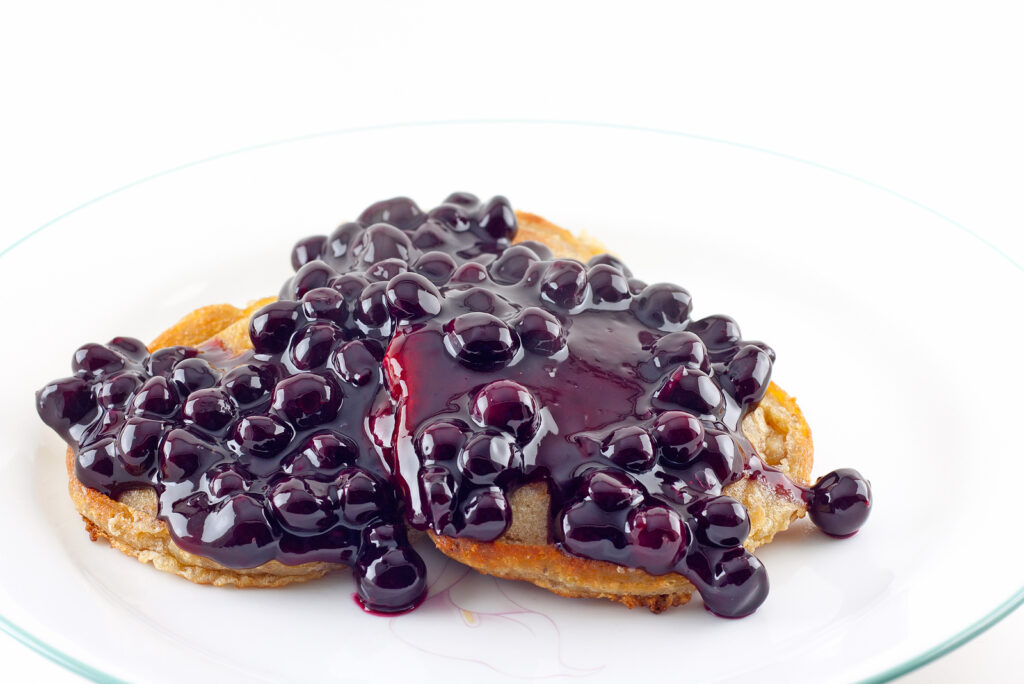
To prepare fruit, work in batches of no more than 6 cups of fruit at a time. In large pot, heat 1 gallon of water to boiling. Place fruit into boiling water. Bring back to boil and boil 1 minute. Remove fruit from water. Drain, but keep warm in a covered bowl or pot. Repeat until all fruit is blanched. In separate pot, combine sugar and Clear Jel. Stir to blend. Add water and mix thoroughly. Add food coloring, if desired. Stir and cook on medium-high heat until mixture thickens and begins to bubble. Add lemon juice and boil 1 minute, stirring constantly. Fold in drained berries and fill hot jars with mixture, leaving 1-inch headspace. Wipe jar rims. Adjust lids and rings according to manufacturer’s instructions. Process immediately in boiling water canner, adjusting for elevation, if needed. Once processing is complete, turn off heat, remove canner lid, and wait 5 minutes before removing jars. Increase wait time to 10 minutes to reduce siphoning/oozing. Let cool, undisturbed, for 12 to 24 hours and check for seals (Figure 6).
| Style of Pack | Jar Size | 0–1,000 ft | 1,001–3,000 ft | 3,001–6,000 ft | Above 6,000 ft |
|---|---|---|---|---|---|
| Hot | Pints or quarts | 30 min | 35 min | 40 min | 45 min |
Cherry Pie Filling
Quantities of ingredients needed for one quart and seven quarts of cherry pie filling.| Ingredients | 1 Quart | 7 Quarts |
|---|---|---|
| Fresh or thawed sour cherries | 3⅓ cups | 6 quarts |
| Granulated sugar | 1 cup | 7 cups |
| Clear Jel | ¼ cup + 1 tablespoon | 1¾ cups |
| Cold water | 1⅓ cups | 9⅓ cups |
| Bottled lemon juice | 1 tablespoon + 1 teaspoon | ½ cup |
| Cinnamon (optional) | ⅛ teaspoon | 1 teaspoon |
| Almond extract (optional) | ¼ teaspoon | 2 teaspoons |
| Red food coloring (optional) | 6 drops | ¼ teaspoon |
Yield: 1 quart or 7 quarts.
Quality: Select fresh, very ripe, but firm cherries. Unsweetened, frozen cherries may be used. If sugar has been added to the frozen cherries, rinse it off while the fruit is still frozen.
Procedure: Rinse and pit fresh cherries and hold in cold water. To prevent stem end browning on light-colored cherries, place cherries in solution containing 1 teaspoon of ascorbic acid per gallon of water. Allow frozen cherries to thaw.
To prepare fruit, work in batches of no more than 6 cups of fruit at a time. In large pot, heat 1 gallon of water to boiling. Place fruit into boiling water. Bring back to boil and boil 1 minute. Remove fruit from water. Drain, but keep warm in a covered bowl or pot. Repeat until all fruit is blanched. In a separate pot, combine sugar and Clear Jel. Stir to blend. Add water and mix thoroughly. Add cinnamon, almond extract, and food coloring, if desired. Stir mixture and cook over medium high heat until mixture thickens and begins to bubble. Add lemon juice and boil 1 minute, stirring constantly. Fold in drained cherries and immediately fill hot jars with mixture, leaving 1-inch headspace. Wipe jar rims. Adjust lids and rings according to manufacturer’s instructions. Process immediately in boiling water canner, adjusting for elevation, if needed. Once processing is complete, turn off heat, remove canner lid and wait 5 minutes before removing jars. Increase wait time to 10 minutes to reduce siphoning/oozing. Let cool, undisturbed, for 12 to 24 hours and check for seals.
Recommended processing time at various altitudes for cherry pie filling in a boiling water canner.| Style of Pack | Jar Size | 0–1,000 ft | 1,001–3,000 ft | 3,001–6,000 ft | Above 6,000 ft |
|---|---|---|---|---|---|
| Hot | Pints or Quarts | 30 min | 35 min | 40 min | 45 min |
Blackberry/Marionberry Pie Filling
Food scientists at Oregon State University have added a Blackberry Pie Filling option to the list of approved USDA (2015) pie filling recipes. Use the cherry pie filling instructions with blackberries (or marionberries).
When making berry filling, do not blanch, and omit the cinnamon, almond extract, and food coloring from the cherry instructions. If berries are frozen, make sure berries are fully thawed before preparation. Use juice from thawed berries to replace part of the water called for in the recipe (Waite-Cusic, personal communication, 2020).
Peach Pie Filling
Quantities of Ingredients Needed for one quart and seven quarts of peach pie filling.| Ingredients | 1 Quart | 7 Quarts |
|---|---|---|
| Sliced fresh peaches | 3½ cups | 6 quarts |
| Granulated sugar | 1 cup | 7 cups |
| Clear Jel | ¼ cup + 1 tablespoon | 2 cups + 3 tablespoons |
| Cold water | ¾ cup | 5¼ cups |
| Cinnamon (optional) | ⅛ teaspoon | 1 teaspoon |
| Almond extract (optional) | ⅛ teaspoon | 1 teaspoon |
| Bottled lemon juice | ¼ cup | 1¾ cups |
Yield: 1 quart or 7 quarts.
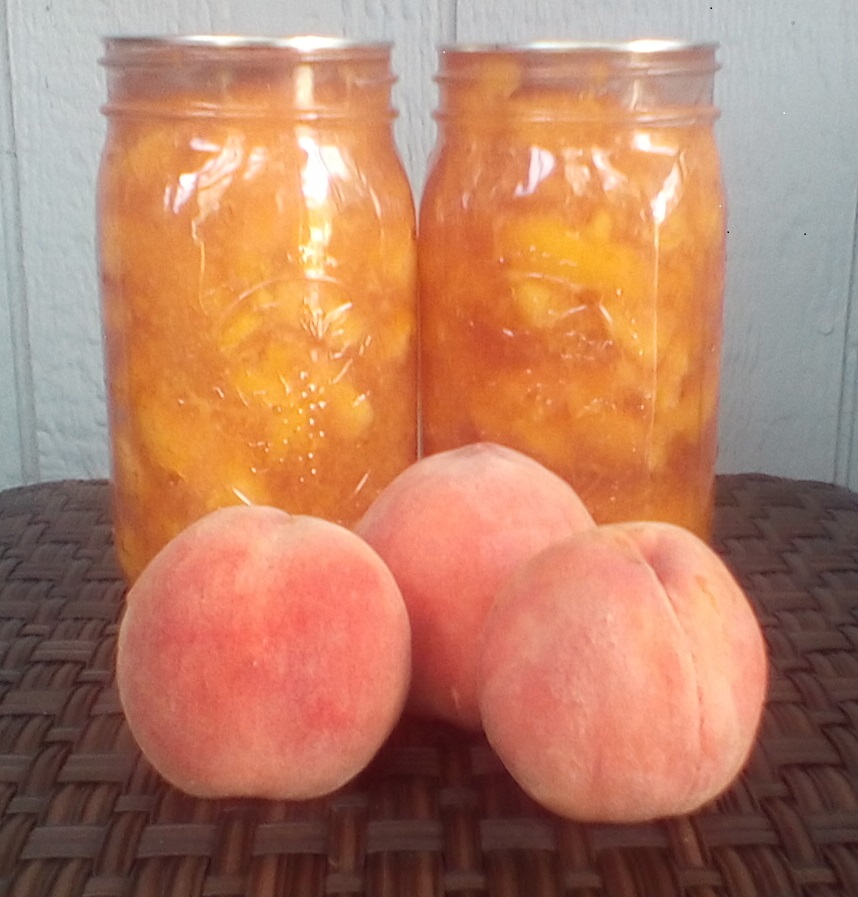
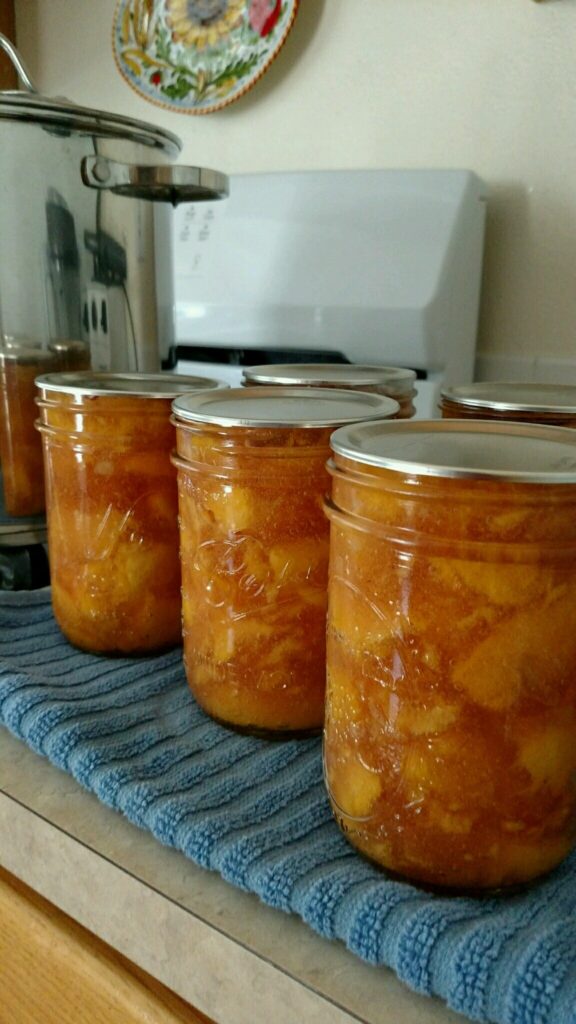
Quality: Select ripe, but firm, fresh peaches (Figure 7).
Procedure: Peel peaches. To loosen skins, submerge peaches in boiling water for approximately 30-60 seconds, and then place in cold water for 20 seconds. Slip off skins and cut ½-inch thick slices. To prevent browning, place slices in water containing 1 teaspoon of ascorbic acid in 1 gallon of water.
To prepare fruit, work in batches of no more than 6 cups of fruit at a time. In large pot, heat 1 gallon of water to boiling. Place fruit into boiling water. Bring back to boil and boil 1 minute. Remove fruit from water. Drain, but keep warm in a covered bowl or pot. Repeat until all fruit is blanched. In separate pot, stir together sugar and Clear Jel. Add water and, if desired, cinnamon and/or almond extract. Mix thoroughly. Stir and cook over medium-high heat until mixture thickens and begins to bubble. Add lemon juice and boil 1 minute, stirring constantly. Fold in drained peach slices and continue to heat mixture for 3 minutes. Fill hot jars without delay, leaving 1-inch headspace. Wipe jar rims. Adjust lids and rings according to manufacturer’s instructions. Process immediately in boiling water canner, adjusting for elevation when needed. Once processing is complete, turn off heat, remove canner lid and wait 5 minutes before removing jars. Increase wait time to 10 minutes to reduce siphoning/oozing. Let cool, undisturbed, for 12 to 24 hours and check for seals.
Recommended processing times at various altitudes for peach pie filling in a boiling water canner.| Style of Pack | Jar Size | 0–1,000 ft | 1,001–3,000 ft | 3,001–6,000 ft | Above 6,000 ft |
|---|---|---|---|---|---|
| Hot | Pints or Quarts | 30 min | 35 min | 40 min | 45 min |
SAFETY ALERT: Use only yellow fleshed peaches to prepare this recipe. White fleshed peaches do not have the same level of acidity as yellow fleshed peaches and cannot be safely processed in a boiling water canner.
Processing Jars in a Boiling Water Canner
Follow these steps for using a boiling water canner to successfully process pie filling.
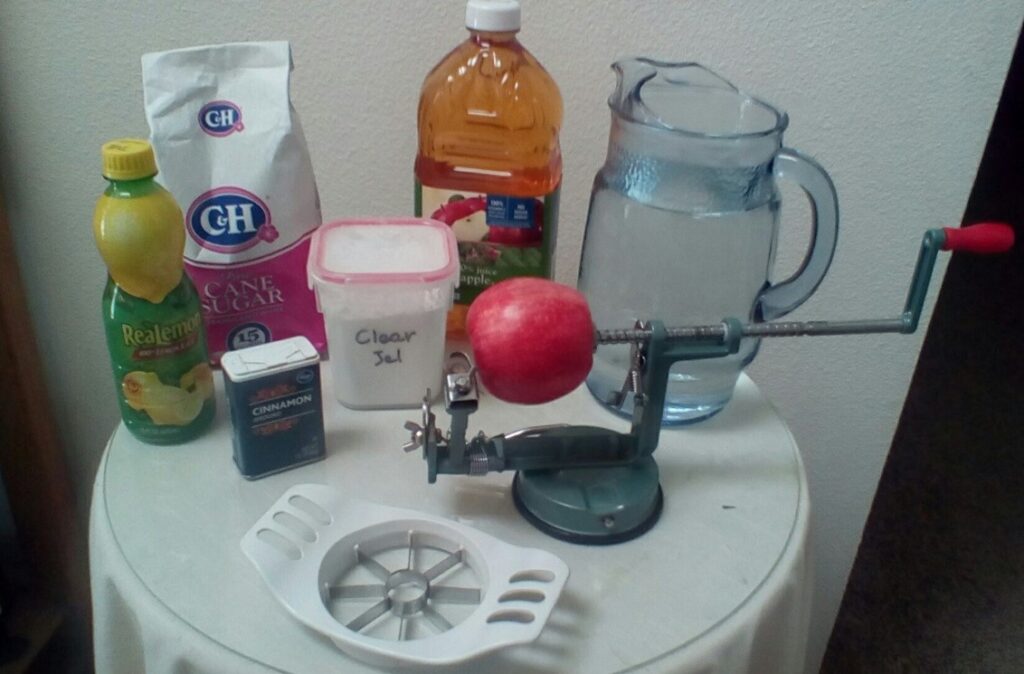
- Assemble equipment and ingredients. Assemble ingredients and equipment needed for preparing and processing the pie filling recipe. Make sure to locate a source of Clear Jel before beginning the preparation process (Figure 8).
- Add water to canner. Before you prepare the pie filling, place canner rack in the bottom of a boiling water canner. Fill the canner half full with clean, warm water for a canner load of pint jars. For other sizes and numbers of jars, you will need to adjust the amount of water so it will be 1 to 2 inches over the top of the filled jars.
- Preheat canner and jars. Center the canner over the burner. Place clean, empty jars in the water in the canner to preheat. Bring water temperature to 180°F (recommended starting temperature for hot-packed foods). Jars can also be preheated in the dishwasher. Preheating jars helps prevent jar breakage. Begin preparing pie filling while the water and jars are preheating.
- Prepare food and fill jars. Prepare the pie filling as instructed and fill hot jars leaving 1-inch headspace. Release trapped air when filling jars by packing lightly with a rubber spatula or plastic spoon. Do not overfill (Figure 9).
- Close jars and place in canner. Wipe rims of jars with damp paper towel. Close with flat canning lid and metal band, according to manufacturer’s instructions. Using a jar lifter, place filled jars, fitted with lids and ring bands, into the canner without delay.
- Check water level. Add additional boiling water, if needed, to bring water level 1 to 2 inches above jar tops. Avoid pouring water directly on the jars. Place the cover on the canner. For processing times over 30 minutes, the water level should be at least 2 inches above the tops of the jars.
- Heat canner. Turn heat to highest setting and heat until water boils vigorously. Select the processing time for the altitude where you live (Figure 10).
- Boil. Once water reaches a vigorous boil, set a timer for the total minutes required for processing the jars of pie filling.
- Cover canner. Keep the canner covered and maintain a boil throughout the process. The heat setting may be lowered as long as a gentle but complete boil is maintained for the entire processing time.
- Watch water level. Add more boiling water during the process, if needed, to keep the water level above the jar tops. Pour the water around the jars and not directly onto them.
- Maintain boil for processing time. If the water stops boiling at any time during the process, turn the heat on its highest setting, bring the water back to a vigorous boil, and begin the timing of the process over, from the beginning.
- Turn off heat. When the jars have been processed in boiling water for the recommended time, turn off the heat and remove the canner lid. Wait 5 minutes before removing jars to allow the jar contents to settle. This waiting period is not required for safety of the food when using USDA (2015) processing times, but it does help jars seal and prevent loss of canning liquid. NOTE: Increasing wait time in canner after processing to 10 minutes can help prevent siphoning of pie filling (Ingham 2017).
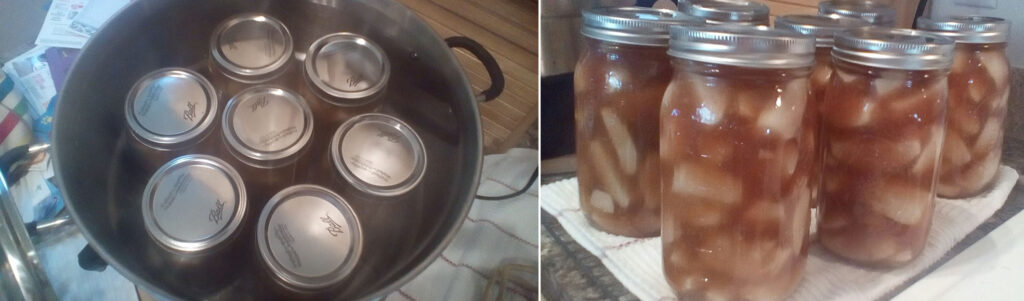
- Remove jars. Using a jar lifter, remove the jars one at a time, being careful not to tilt the jars. Carefully place them directly onto a towel or cooling rack, leaving at least one inch of space between the jars during cooling. Avoid placing the jars on a cold surface or in a cold draft.
- Cool jars. Let the jars sit undisturbed while they cool, for 12 to 24 hours (Figure 10). Do not tighten ring bands on the lids or push down on the center of the flat metal lid until jars are completely cooled.
- Inspect seal before 24 hours has passed. Remove ring bands from sealed jars. Any unsealed jars can be put in the refrigerator and enjoyed within 2 to 4 days, reprocessed for the full processing time, or frozen.
- Wash. Wash jars and lids to remove all residues before storage.
- Label. Label jars with description of contents, processing information, and date. Store in a cool, dry place out of direct light. For best quality, use home canned foods within one year of processing.
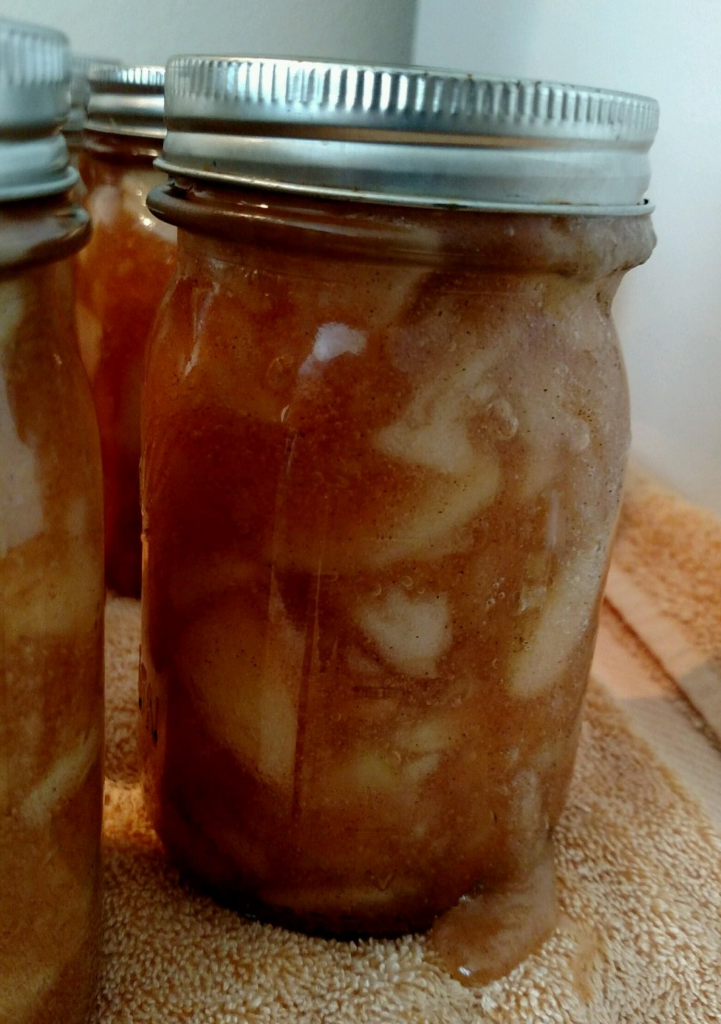
Siphoning of Pie Filling
Siphoning of pie filling, or more commonly described as oozing, is a common complaint from consumers when canning these pie fillings (Figure 11). Siphoning occurs because of the rapid change in temperature and air pressure when taking jars out of the canner at the end of the processing time. To minimize oozing, turn off the heat at the end of the processing time and wait before removing the jars from the canner. The recommendation for foods processed in a boiling water canner is 5 minutes. When processing the pie filling recipes, a 10 minute wait before removing jars from the canner will reduce or eliminate siphoning. Be sure to remove jars after 10 minutes and allow to sit undisturbed, for 12 to 24 hours (Ingham 2017).
Additional suggestions to help prevent siphoning or oozing:
- Follow directions carefully for preparation of fruit. Raw fruit has a lot of air in its tissues. The blanching step helps remove air, leaving less to be removed during the canning process.
- Remove air bubbles prior to sealing. The pie fillings are very thick and can trap air bubbles in the jar (Figure 12). Pack carefully as you fill the jars to eliminate pockets of air.
- Watch your headspace. Be sure to leave at least 1-inch headspace in each jar. Leaving even a bit more, up to 1¼ inch, can help to prevent oozing.
- Keep your filling hot and have your canner ready to go! Avoid delays at all steps of the process. Jars should promptly be filled, placed in the canner, and processed according to recipe instructions.
- Reduce the amount of Clear Jel. Research conducted at the University of Wisconsin found reducing Clear Jel to three quarters of the amount called for in the recipe will produce a very acceptable filling but one that is less thick and less likely to ooze from the jars. For example, if the recipe calls for 1½ cups of Clear Jel, use just three quarters of this amount, or 1 cup plus 2 tablespoons (Ingham 2017).

Preparing Pies with Home Canned Fillings
Prepare a single or double crust using the canned fillings. For a single crust pie, prepare and bake a single pie crust. Cool thoroughly and fill with pie filling. For double crust pie, prepare pie crusts. Assemble pie, using canned filling. Bake at 425°F for 20–25 minutes or until crust is brown and filling is hot (Figure 13).
These pie fillings can also be frozen instead of canned for long-term storage.
References
Ingham, B. 2017. Safe Preserving: Oozing Canned Pie Filling. University of Wisconsin-Madison Division of Extension.
USDA (United States Department of Agriculture). 2015. USDA Complete Guide to Home Canning, 2015 revision. National Center for Home Food Preservation.
Waite-Cusic, J. 2020. Personal communication. Blackberry pie filling.
By,
Lizann Powers-Hammond, Associate Professor, Benton County Extension, Washington State University

PNW736
Published and distributed in furtherance of the Acts of Congress of May 8 and June 30, 1914, by Washington State University Extension, Oregon State University Extension Service, University of Idaho Extension, and the U.S. Department of Agriculture cooperating. WSU Extension programs, activities, materials, and policies comply with federal and state laws and regulations on nondiscrimination regarding race, sex, religion, age, color, creed, and national or ethnic origin; physical, mental, or sensory disability; marital status or sexual orientation; and status as a Vietnam-era or disabled veteran. Washington State University Extension, Oregon State University Extension Service, and University of Idaho Extension are Equal Opportunity Employers. Evidence of noncompliance may be reported through your local Extension office. Trade names have been used to simplify information; no endorsement is intended.
Pacific Northwest Extension publications contain material written and produced for public distribution. You may reprint written material, provided you do not use it to endorse a commercial product. Please reference by title and credit Pacific Northwest Extension publications.
Order Information:
WSU Extension
Fax: 509-335-3006
Toll-free phone: 800-723-1763
Email: ext.pubs@wsu.edu
OSU Extension
Fax: 541-737-0817
Toll-free phone: 800-561-6719
Email: puborders@oregonstate.edu
UI Extension
Fax: 208-885-4648
Phone: 208-885-7982
Email: calspubs@uidaho.edu
Copyright © Washington State University
Pacific Northwest Extension publications are produced cooperatively by the three Pacific Northwest land-grant universities: Washington State University, Oregon State University, and the University of Idaho. Similar crops, climate, and topography create a natural geographic unit that crosses state lines. Since 1949, the PNW program has published more than 650 titles, preventing duplication of effort, broadening the availability of faculty specialists, and substantially reducing costs for the participating states.