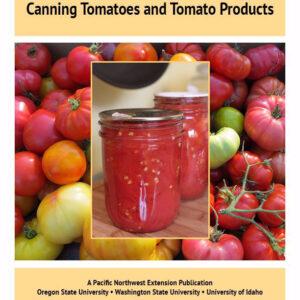
Description
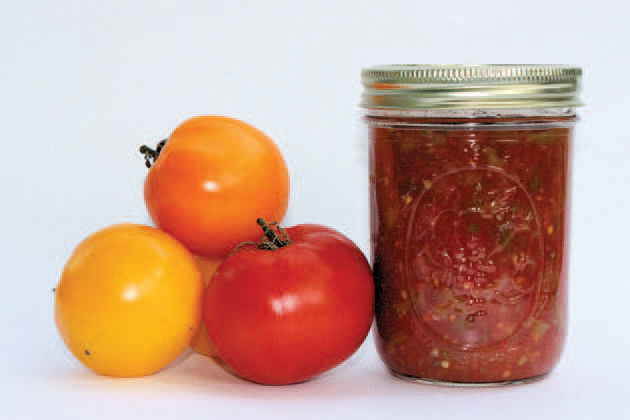
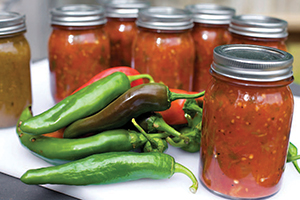
Salsa is one of the most popular condiments in homes today. Because of its popularity, consumers want to prepare and can salsas at home. Home canning of salsa is possible as long as it is prepared and processed according to a recipe tested for safety.
Most salsa recipes are a mixture of low-acid foods, such as onions and peppers, with acid foods, such as tomatoes or fruit. Salsa recipes for canning with a boiling water canner must meet acidity-level requirements to prevent the growth of botulism bacteria. The salsa recipes in this publication have been tested under laboratory conditions to ensure that they contain enough acid to be processed safely in a boiling water canner.
Caution about using original salsa recipes
Because salsas are a mixture of acid and low-acid ingredients, they are an example of an acidified food appropriate for boiling water canning if—and only if—the level of acidity is adequate to prevent production of the botulism toxin. If the mixture has less acidity, it needs to be treated as a low-acid food, which requires additional laboratory testing to develop the processing recommendations for the elimination of botulism risk. To avoid this serious form of foodborne illness, follow the directions carefully for each recipe in this publication. Never can salsas that do not follow these or other research-tested recipes. Freezing is the only safe option for preserving untested or original salsa recipes.
Ingredients
Tomatoes

Use only high-quality tomatoes for canning salsa or any other tomato product. Avoid tomatoes that are overripe or from dead or frost-killed vines. These will result in a poor-quality and potentially unsafe product. Canning is never a good way to use overripe or spoiling tomatoes.
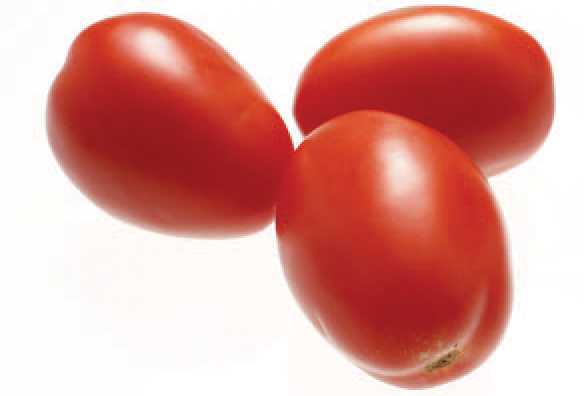
The type of tomato you use affects the quality of your salsa. For example, paste tomatoes, such as Roma, have firmer flesh and produce thicker salsas than large slicing tomatoes. Although both types make good-tasting salsas, slicing tomatoes usually yield a thinner, more watery salsa than paste tomatoes.
Where recipes call for peeled or skinned tomatoes, remove the skin by dipping tomatoes into boiling water for 30–60 seconds or until skins split. Immerse in cold water until cool enough to handle. Slip off skins and remove cores. Remove seeds if desired.
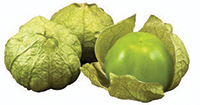
Tomatillos
Tomatillos are also known as Mexican husk tomatoes. They do not need to be peeled or seeded, but the dry outer husk must be removed.
Fruit
Some salsa recipes in this publication contain fruit. Fruits add another dimension of flavor to traditional salsas. When canning fruit salsas you must follow the same safety rules as tomato-based salsas. This includes using a research-tested recipe, selecting fruits in the quantity and condition described, and preparing fruits according to the directions.
Peppers
Choose high-quality peppers. Peppers range from mild to fiery in taste. Very hot peppers are usually small (1–3 inches long); mild peppers are usually bigger (4–10 inches long). Anaheim, ancho, college, Colorado, and Hungarian yellow wax are mild varieties. Choose a mild pepper when the recipe calls for long green chiles.
Caution about working with hot peppers
Wear plastic or rubber gloves when you cut or dice hot peppers because they cause extreme irritation to the skin. Do not touch your face, particularly the area around your eyes, when you are working with hot peppers.
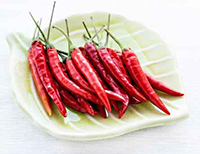
Small, very hot peppers provide a distinct taste to salsas. Jalapeño is the most popular hot pepper. Other common hot varieties include serrano, cayenne, habañero, and tabasco.
The terms chiles, peppers, and chile peppers are used interchangeably in this publication. Although there is no clear standard for naming peppers, in many instances, chile is used for a hot pepper, or a pepper containing capsaicin, the compound that gives the heat or burning sensation in the mouth. Chile peppers are generally classified as mild, medium, or hot. Sweet peppers, such as bell peppers, do not contain any capsaicin, or heat compounds.
Acids
The acid ingredients used in salsa help preserve it. The addition of acid to salsa recipes for canning is necessary because the natural level of acidity may not be adequate for safety. Commonly used acids in home canning are vinegar, lemon, and lime juices. Lemon and lime juices are more acidic than vinegar, but have less effect on flavor. Use only vinegar that is at least 5% acid and only bottled lemon and lime juices. Never use homemade vinegar or freshly squeezed lemon or lime juice because the level of acidity is variable and could result in an unsafe canned product.
Salt
Pickling or canning salt is recommended when preparing salsa recipes. It contains no anti-caking agents or iodine. Non-iodized table salt can also be used in salsa recipes.
Spices
Spices add flavoring to salsas. Cilantro and cumin are often used in spicy salsas. You may leave them out or reduce the amount if you prefer a salsa with a milder taste. For a stronger cilantro flavor, add fresh cilantro after opening the jar, just before serving.
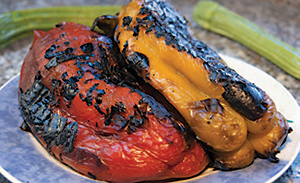
Peeling Peppers
The skin of long green chiles may be tough and can be removed by heating the peppers. Usually when peppers are finely chopped, they do not need to be skinned.
Hot peppers do not need to be peeled, but seeds are often removed to reduce heat.
If you choose to peel chiles, slit each pepper along the side to allow steam to escape. Peel using one of the following two methods:
- Oven or broiler method—Place peppers in a hot oven (400°F) or broiler for 6–8 minutes until the skins blister.
- Range-top method—Cover a hot burner, either gas or electric, with heavy wire mesh. Place peppers on the burner for several minutes until skins blister.
After heating, place peppers in a pan and cover with a damp cloth or paper towel. (This will make peeling the peppers easier.) Cool several minutes; slip off skins. Discard seeds and chop.
Adjustments to Salsa Recipes
Some ingredients in salsa recipes can be adjusted to suit personal tastes. The changes are primarily limited to ingredient type. It is important not to change the amount of any ingredient, with the exception of dry spices. The table below summarizes the adjustments that can be made to the recipes in this publication without affecting the safety of your canned salsa.
Caution about additional ingredients
Adding ingredients not listed in a salsa recipe will result in an unsafe product if done before canning. This includes thickeners as well as ingredients not listed in the recipe.
Do no thicken salsas before canning. Salsa can be thickened after you open the jar by pouring off some of the liquid or adding cornstarch, tomato paste, or other thickening agent.
The flavor can be enhanced with additional ingredients such as corn, black beans, or other additions just before serving. Addition before canning will result in an unsafe product.
| Ingredient | Recipe Adjustments |
|---|---|
| Tomatoes | As long as tomatoes are in good condition, any variety can be used. Paste tomatoes, such as Romas, have more solid tissue and will produce a salsa with a thicker texture. Slicing tomatoes will produce a runny, more watery salsa. Underripe green tomatoes or tomatillos can be substituted for ripe tomatoes. Although salsas are traditionally made with red tomatoes, any color of tomato can be used. |
| Peppers | One type of pepper can be substituted for another. Select any combination of hot and mild pepper to create a flavor you like, as long as you do not exceed the total amount specified. (For example, if the recipe allows for 2 cups of peppers, any mixture of hot and mild peppers can be used.) Bell peppers are an acceptable substitution for some or all of the long green chiles. Do not substitute the same number of whole peppers of a large size for the same number of peppers of a smaller size (For example, do not use 6 bell peppers or long chiles in place of 6 jalapeños or serranos). Canned chiles may be used in place of fresh. |
| Onions | Red, yellow, or white onions can be substituted for each other. Do not increase the total amount of onions. Green onions cannot be used in place of bulb onions. Do not use green onions in a canned salsa recipe unless they are specified as an ingredient. |
| Fruits | Use fruits in the condition described in the recipe. When a recipe calls for green or unripe fruits, do not use ripe fruits. This will change the final acidity of the mixture, resulting in an unsafe product. It is not safe to substitute one type of fruit for another. |
| Acids | Any type of vinegar can be used as long as it is 5% acidity. White vinegar has a tart flavor but will not discolor the salsa. Cider vinegar has a milder flavor but may affect the color of the final product. Flavored or other specialty vinegars can be used as long as they meet acidity guidelines. Never reduce the amount of vinegar, lemon juice, or lime juice in a recipe. An equal amount of bottled lemon or lime juice can be substituted for vinegar when the recipe calls for vinegar. The reverse is not true: When lemon or lime juice is the acid called for in the recipe, vinegar cannot be substituted. This is because vinegar is less acidic than lemon or lime juice, and the substitution would result in an unsafe salsa. Key lime juice should not be used as lime juice. If prepared salsa is too tart, a small amount of sugar can be added after opening to offset the acidic taste. |
| Spices and Herbs | The amounts of dried herbs or spices can be altered. It is not safe to add or increase the amounts of fresh herbs or garlic before canning because they affect the acidity level. |
Processing
Filling the Jars
Follow the manufacturer’s directions for preparing lids. Fill hot, clean jars with hot salsa, being careful not to leave any salsa on the rims. Remove any air bubbles and adjust the headspace if needed. Wipe jar rims with a clean, damp paper towel. Put on lids and screw on metal bands.
Using a Boiling Water Canner
- Use a rack to keep jars from touching the canner bottom and to allow heat to reach all sides of the filled jars. Fill the canner half full of water.
- Preheat water to 180°F. Place empty jars into the canner to preheat to help prevent breakage. Jars can also be preheated in a dishwasher. Pretreat lids according to the manufacturer’s directions.
- Fill hot jars according to the recipe instructions. Load filled jars into the canner, keeping them upright at all times.
- Add more boiling water, if needed, to bring water 1–2 inches above jar tops. Avoid pouring water directly on the jars. Place the lid on the canner. (If a pressure canner is used for water-bath canning, leave the cover unfastened and the petcock open to prevent pressure buildup.)
- Turn heat to the highest setting and heat until water reaches a full rolling boil. Once boiling, set a timer for the total minutes required to process the salsa.
- Keep the canner covered and maintain a boil throughout the processing time. The heat setting can be lowered to a gentle boil as long as the boil is maintained for the entire process time. If the water stops boiling at any time during the process, bring it back to a full rolling boil and begin the timing of the process over, from the beginning.
- Add more boiling water if necessary to keep the water level above the jars.
- When the processing time is complete, turn off the heat and remove the canner lid. Wait 5 minutes before removing jars.
- Using a jar lifter, remove the jars, being careful not to tilt them, and place on a towel 1 inch apart. Spoilage could occur if the jars are left in hot water.
Cooling the Jars
Cool the jars on a rack or cloth at room temperature, allowing air to circulate freely around them. Avoid cold drafts or fans blowing on the jars.
Do not retighten screw bands after processing. Retightening hot lids may cut through the gasket and cause seal failure.
Testing for Seal
After cooling 12–24 hours, test each jar for a seal. Jars with flat metal lids are sealed if any of the following apply:
- The lid has popped down in the center.
- The lid does not move when pressed down.
- Tapping the center of the lid with a spoon gives a clear, ringing sound. (This is the least reliable method.)
If a jar is not sealed, refrigerate the contents and use within a few days, or reprocess within 24 hours of the initial processing. When reprocessing, the salsa must first be heated to a boil before packing in hot jars. Wipe the jar rims clean. Use a new lid and process for the full amount of time listed.
Storing
Remove the screw bands so the lids under them do not cause rusting. Wipe jars. Label with the date, contents of the jar, and processing information.
Store jars in a cool, dark place. For best eating quality and nutritive value, use within one year. Heat, freezing temperatures, light, or dampness will decrease the quality and shelf life of canned food.
Before Using
Before opening each jar, examine it for signs of spoilage. Check the lid for tightness and a vacuum seal. Holding the jar at eye level, look for streaks of dried food on the outside of the jar. Inside the jar, look for cloudy canning liquid, rising air bubbles, or any unnatural color. While opening the jar, watch for spurting liquid or cotton-like mold growth on food surfaces or under the lid. Smell for unnatural or off odors. If there is any sign of spoilage, destroy the food. Never taste food from a jar with an unsealed lid or food that shows signs of spoilage.
Disposal of Unsafe Salsa
Unsafe jars of salsa must be discarded carefully to prevent possible illness to you, your family, or your pets. Any salsa that was not prepared according to these or other research-tested recipe should be treated as having produced botulinum toxin and handled in one of two ways:
- If the suspect jars are still sealed, write on the jar Poison: Danger. Do Not Eat. Place the jars in a heavyweight garbage bag. Close and place the bag in a regular trash container or nearby landfill.
- If the suspect jars are unsealed, open, or leaking, they should be detoxified according to the following directions before disposal.
Detoxification Process
Wear rubber or heavy plastic gloves when handling suspect salsa and cleaning up. Remove the jar lids and carefully place the suspect jars (along with the lids) on their sides without splashing in a stock pot, pan, or boiling water canner (8-quart volume or larger). Wash your gloved hands well. Carefully add water until the level is 1 inch above the jars. Put a lid on the pot and heat the water to boiling. Boil for 30 minutes to detoxify the food. Cool and discard the food and lids. Wash the jars and pot.
Spray or wet contaminated surfaces (such as counters and cutting boards) with a household chlorine bleach solution (1 part unscented 5–6% sodium hypochlorite bleach to 5 parts clean room temperature water) and let stand for 30 minutes. Wipe up treated spills with paper towels and put them in a plastic bag before discarding in the trash. Rinse surfaces. Soak metal utensils in a mild chlorine solution (1 teaspoon bleach to 1 quart room temperature water) for 30 minutes. Rinse.
Recipes
Tomatillo Green Salsa
5 cups chopped tomatillos (or green tomatoes)
1½ cups seeded, chopped long green chiles
½ cup seeded, finely chopped jalapeño peppers
4 cups chopped onions
1 cup bottled lemon or lime juice
6 cloves garlic, finely chopped
1 tablespoon ground cumin (optional)
3 tablespoons oregano leaves (optional)
1 tablespoon salt
1 teaspoon black pepper
Combine all ingredients in a large saucepan and stir frequently over high heat until mixture begins to boil, then reduce heat and simmer for 20 minutes, stirring occasionally. Ladle hot salsa into hot pint jars, leaving ½-inch headspace. Remove air bubbles and adjust head space if needed. Wipe rims. Adjust lids and process in a boiling water canner 15 minutes at 0–1,000 feet altitude; 20 minutes at 1,001–6,000 feet; or 25 minutes above 6,000 feet.
Yield: 5 pints
Tomato Salsa (using paste tomatoes)
7 quarts peeled, cored, chopped paste tomatoes*
4 cups seeded, chopped long green chiles
5 cups chopped onion
½ cup seeded, finely chopped jalapeño peppers
6 cloves garlic, finely chopped
2 cups bottled lemon or lime juice
2 tablespoons salt
1 tablespoon black pepper
2 tablespoons ground cumin (optional)
3 tablespoons oregano leaves (optional)
2 tablespoons fresh cilantro (optional)
*This recipe works best with paste tomatoes. Slicing tomatoes require a much longer cooking time to achieve a desirable consistency.
Combine all ingredients except cumin, oregano, and cilantro in a large pot and bring to a boil, stirring frequently. Reduce heat and simmer 10 minutes. Add spices and simmer for another 20 minutes, stirring occasionally. Ladle hot salsa into hot pint jars, leaving ½-inch headspace. Remove air bubbles and adjust headspace if needed. Wipe rims. Adjust lids and process in a boiling water canner 15 minutes at 0–1,000 feet altitude; 20 minutes at 1,001–6,000 feet; or 25 minutes above 6,000 feet.
Yield: 16–18 pints
Tomato Salsa (using slicing tomatoes)
4 cups peeled, cored, chopped slicing tomatoes
2 cups seeded, chopped long green chiles
½ cup seeded, chopped jalapeño peppers
¾ cup chopped onions
4 cloves garlic, finely chopped
2 cups vinegar (5% acid)
1 teaspoon ground cumin (optional)
1 tablespoon oregano leaves (optional)
1 tablespoon fresh cilantro (optional)
1½ teaspoons salt
Combine all ingredients in a large saucepan and bring to a boil, stirring frequently. Reduce heat and simmer 20 minutes, stirring occasionally. Ladle hot salsa into hot pint jars, leaving ½-inch headspace. Remove air bubbles and adjust headspace if needed. Wipe rims. Adjust lids and process in a boiling water canner 15 minutes at 0–1,000 feet altitude; 20 minutes at 1,001–6,000 feet; or 25 minutes above 6,000 feet.
Yield: 4 pints

Tomato/Green Chile Salsa
3 cups peeled, cored, chopped tomatoes
3 cups seeded, chopped long green chiles
¾ cup chopped onions
1 jalapeño pepper, seeded and finely chopped
6 cloves garlic, finely chopped
1½ cups vinegar (5% acid)
½ teaspoon ground cumin (optional)
2 teaspoons oregano leaves (optional)
1½ teaspoons salt
Combine all ingredients in a large saucepan and heat, stirring frequently, until mixture boils. Reduce heat and simmer for 20 minutes, stirring occasionally.
Ladle hot salsa into hot pint jars, leaving ½-inch headspace. Remove air bubbles and adjust headspace if needed. Wipe rims. Adjust lids and process in a boiling water canner 15 minutes at 0–1,000 feet altitude; 20 minutes at 1,001–6,000 feet; or 25 minutes above 6,000 feet.
Yield: 3 pints

Tomato Taco Sauce
8 quarts peeled, cored, finely chopped paste tomatoes*
2 cloves garlic, crushed
5 cups chopped onions
4 jalapeño peppers, seeded, chopped
4 long green chiles, seeded, chopped
2½ cups vinegar (5% acid)
2 tablespoons salt
1½ tablespoons black pepper
1 tablespoon sugar
2 tablespoons oregano leaves (optional)
1 teaspoon ground cumin (optional)
* This recipe works best with paste tomatoes, as slicing tomatoes will yield a thin, watery salsa. If you only have slicing tomatoes available, use the Tomato/Tomato Paste Salsa recipe.
Combine ingredients in a large saucepan. Bring to a boil, then reduce heat and simmer, stirring frequently until thick (about 1 hour). Ladle hot mixture into hot pint jars, leaving ½-inch headspace. Remove air bubbles and adjust headspace if needed. Wipe rims. Adjust lids and process in boiling water canner 15 minutes for 0–1,000 feet altitude; 20 minutes at 1,001–6,000 feet; or 25 minutes above 6,000 feet.
Yield: 16–18 pints
Choice Salsa
6 cups peeled, cored, seeded, chopped ripe tomatoes
9 cups diced onions and/or peppers of any variety
1½ cups bottled lemon or lime juice
1 tablespoon canning or pickling salt
Chop tomatoes into ¼- to ½-inch pieces. Dice onions and peppers into ¼-inch pieces. Combine tomatoes, onions, and peppers in large saucepan; add lemon or lime juice and salt. Heat to a boil over medium heat while stirring. Reduce heat and simmer for 3 minutes, stirring to prevent scorching. Ladle hot salsa into hot half-pint or pint jars, leaving ½-inch headspace. Remove air bubbles and adjust headspace if needed. Wipe rims. Adjust lids and process in a boiling water canner 15 minutes at 0–1,000 feet altitude; 20 minutes at 1,001–6,000 feet; or 25 minutes above 6,000 feet.
Yield: About 6 pints
Tomato/Tomato Paste Salsa
3 quarts peeled, cored, chopped slicing tomatoes
3 cups chopped onions
6 jalapeño peppers, seeded and finely chopped
4 long green chiles, seeded and chopped
4 cloves garlic, finely chopped
2 12-ounce cans tomato paste
2 cups bottled lemon or lime juice
1 tablespoon salt
1 tablespoon sugar
1 tablespoon ground cumin (optional)
2 tablespoons oregano leaves (optional)
1 teaspoon black pepper
Combine all ingredients in a large saucepan. Bring to a boil. Reduce heat and simmer for 30 minutes, stirring occasionally. Ladle hot salsa into hot pint jars, leaving ½-inch headspace. Remove air bubbles and adjust headspace if needed. Wipe rims. Adjust lids and process in a boiling water canner 15 minutes at 0–1,000 feet altitude; 20 minutes at 1,001–6,000 feet; or 25 minutes above 6,000 feet.
Yield: 7–9 pints
Chile Salsa/Hot Tomato-Pepper Sauce
10 cups peeled, cored, chopped tomatoes
6 cups seeded, chopped chile peppers (mixture of mild and hot)
4 cups chopped onions
1 cup vinegar (5% acid)
1 tablespoon salt
½ teaspoon pepper
Combine ingredients in a large saucepan. Heat to a boil and simmer 10 minutes. Ladle hot salsa into hot pint jars, leaving ½-inch headspace. Remove air bubbles and adjust headspace if needed. Wipe rims. Adjust lids and process in a boiling water canner 15 minutes at 0–1,000 feet altitude; 20 minutes at 1,001–6,000 feet; or 25 minutes above 6,000 feet.
Yield: 7–9 pints
Caution about working
with mangoes
Handling green mangoes may irritate the skin of some people in the same way to poison ivy. (They belong to the same plant family.) To avoid this reaction, wear plastic or rubber gloves while working with raw green mango. Do not touch your face, lips, or eyes after touching or cutting raw green mangoes until all traces are washed away.
Mango Salsa
6 cups diced unripe mango (3–4 large, hard, green mangoes)
1½ cups diced red bell pepper
½ cup finely chopped yellow onion
½ teaspoon crushed red pepper flakes
2 teaspoons finely chopped garlic
2 teaspoons finely chopped ginger
1 cup light brown sugar
1¼ cups cider vinegar (5% acid)
½ cup water
Peel and chop mangos into ½-inch cubes. Dice bell pepper into ½-inch pieces. Finely chop yellow onions. Combine all ingredients in an 8-quart Dutch oven or stockpot. Heat to a boil, stirring to dissolve sugar. Reduce heat to simmering, and simmer 5 minutes. Ladle hot solids into hot half-pint jars, leaving ½-inch headspace. Cover with hot liquid, leaving ½-inch headspace. Remove air bubbles and adjust headspace if needed. Wipe rims. Adjust lids and process in a boiling water canner 10 minutes at 0–1,000 feet altitude; 15 minutes at 1,001–6,000 feet; or 20 minutes above 6,000 feet.
Yield: About 6 half-pint jars
Peach Salsa
Follow the directions for Mango Salsa, replacing the mango with hard, underripe but yellow peaches.
Peach Apple Salsa
6 cups (2¼ pounds) chopped Roma tomatoes
2½ cups diced yellow onions
2 cups chopped green bell pepper
10 cups (3½ pounds) chopped hard, unripe peaches
2 cups chopped Granny Smith apples
4 tablespoons mixed pickling spice
1 tablespoon canning salt
2 teaspoons crushed red pepper flakes
3¾ cups (1¼ pounds) packed light brown sugar
2¼ cups cider vinegar (5% acid)
Place pickling spice on a clean, double-layered 6-inch-square piece of 100% cheesecloth. Bring corners together and tie with a clean string. (Or use a purchased muslin spice bag.) Wash and peel tomatoes. Chop into ½-inch pieces. Dice onions and peppers into ¼-inch pieces. Combine chopped tomatoes, onions, and peppers in an 8- or 10-quart Dutch oven or saucepot. Wash, peel, and pit peaches; cut into halves and soak for 10 minutes in an ascorbic acid solution (1500 mg in ½ gallon water). Wash, peel, and core apples; cut into halves and soak for 10 minutes in ascorbic acid solution. Quickly chop peaches and apples into ½-inch cubes to prevent browning. Add chopped peaches and apples to the saucepot with the vegetables.
Add the pickling spice bag to the saucepot; stir in the salt, red pepper flakes, brown sugar, and vinegar. Bring to boiling, stirring gently to mix ingredients. Reduce heat and simmer 30 minutes, stirring occasionally. Remove spice bag from pan and discard. With a slotted spoon, fill hot salsa solids into hot, clean pint jars, leaving 1¼-inch headspace (about ¾ pound solids in each jar). Cover with cooking liquid, leaving ½-inch headspace. Remove air bubbles and adjust headspace if needed. Wipe rims. Adjust lids and process in a boiling water canner 15 minutes at 0–1,000 feet altitude; 20 minutes at 1,001–6,000 feet; or 25 minutes above 6,000 feet.
Yield: About 7 pints
Spicy Cranberry Salsa
6 cups chopped red onion
4 finely chopped large serrano peppers
1½ cups water
1½ cups cider vinegar (5% acid)
1 tablespoon canning salt
1 1⁄3 cups sugar
6 tablespoons clover honey
12 cups (2¾ pounds) rinsed, fresh whole cranberries
Combine all ingredients except cranberries in a large Dutch oven. Bring to a boil over high heat; reduce heat slightly and boil gently for 5 minutes. Add cranberries, reduce heat slightly and simmer mixture for 20 minutes, stirring occasionally to prevent scorching. Fill the hot mixture into clean, hot pint jars, leaving ¼-inch headspace. Leave saucepot over low heat while filling jars. Remove air bubbles and adjust headspace if needed. Wipe rims. Adjust lids and process in a boiling water canner 10 minutes at 0–1,000 ft altitude; 15 minutes at 1,001–6,000 ft; or 20 minutes above 6,000 ft.
Yield: About 6 pints
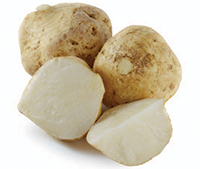
Spicy Jicama Relish
9 cups diced jicama (about 4 pounds)
1 tablespoon whole mixed pickling spice
1 two-inch stick cinnamon
8 cups white vinegar (5% acid)
4 cups sugar
2 teaspoons crushed red pepper
4 cups diced yellow bell pepper
4½ cups diced red bell pepper
4 cups chopped onion
2 fresh fingerhot peppers* (about 6 inches each), finely chopped and partially seeded
*Fingerhot peppers, also known as Jwala peppers, are a hot, spicy pepper commonly used in Indian foods. The pepper is long, slender, wrinkled, and about as long as a finger.
Wash, peel, and trim jicama; dice. Place pickling spice and cinnamon on a clean, double-layered 6-inch-square piece of 100% cotton cheesecloth. Bring corners together and tie with a clean string. (Or use a purchased muslin spice bag.) In a 4-quart Dutch oven or saucepot, combine pickling spice bag, vinegar, sugar, and crushed red pepper. Bring to a boil, stirring to dissolve sugar. Stir in diced jicama, sweet peppers, onion, and fingerhots. Return mixture to boiling. Reduce heat and simmer, covered, over medium-low heat about 25 minutes. Discard spice bag.
Fill relish into hot, clean pint jars, leaving ½-inch headspace. Cover with hot pickling liquid. Remove air bubbles and adjust headspace if needed. Wipe rims. Adjust lids and process in boiling water canner 20 minutes at 0–1,000 feet altitude; 25 minutes at 1,001–3,000 feet; 30 minutes at 3,001–6,000 feet; or 35 minutes above 6,000 feet.
Yield: About 7 pints
Acknowledgements
Thanks to Barry Swanson and Mike Costello, WSU School of Food Science, who helped develop seven of the eight recipes listed on pages 6–9. Thanks to the National Center for Home Food Preservation, University of Georgia, for developing and sharing the Choice Salsa recipe listed on page 9 and the remaining four recipes (plus one variation) on pages 10–12.
2014 revision by Lizann-Powers Hammond, food safety regional specialist, WSU Extension. 1992 original and 2000 revision by Val Hillers, food safety specialist, and Richard H. Dougherty, food processing specialist, both with WSU Extension and the School of Food Science.
Published and distributed in furtherance of the Acts of Congress of May 8 and June 30, 1914, by Washington State University Extension, Oregon State University Extension Service, University of Idaho Extension, and the U.S. Department of Agriculture cooperating. WSU Extension programs, activities, materials, and policies comply with federal and state laws and regulations on nondiscrimination regarding race, sex, religion, age, color, creed, and national or ethnic origin; physical, mental, or sensory disability; marital status or sexual orientation; and status as a Vietnam-era or disabled veteran. Washington State University Extension, Oregon State University Extension Service, and University of Idaho Extension are Equal Opportunity Employers. Evidence of noncompliance may be reported through your local Extension office. Trade names have been used to simplify information; no endorsement is intended.
Pacific Northwest Extension publications contain material written and produced for public distribution. You may reprint written material, provided you do not use it to endorse a commercial product. Please reference by title and credit Pacific Northwest Extension publications.
Order Information:
WSU Extension
Fax: 509-335-3006
Toll-free phone: 800-723-1763
Email: ext.pubs@wsu.edu
OSU Extension
Fax: 541-737-0817
Toll-free phone: 800-561-6719
Email: puborders@oregonstate.edu
UI Extension
Fax: 208-885-4648
Phone: 208-885-7982
Email: calspubs@uidaho.edu
Copyright © Washington State University
Pacific Northwest Extension publications are produced cooperatively by the three Pacific Northwest land-grant universities: Washington State University, Oregon State University, and the University of Idaho. Similar crops, climate, and topography create a natural geographic unit that crosses state lines. Since 1949, the PNW program has published more than 650 titles, preventing duplication of effort, broadening the availability of faculty specialists, and substantially reducing costs for the participating states.