Description
Table of Contents
- Introduction
- Safety Checklist
- Selection of Equipment
- Preparing Equipment
- Filling Jars
- Processing in a Pressure Canner
- Cooling Jars
- Testing the Seal
- Reprocessing Jars
- Storage
- Before Use
- Procedures for Canning Meat, Poultry, and Game
- Tips for Quality Canned Meat
- Poultry or Rabbit
- Ground or Chopped Meat
- Strips, Cubes, or Chunks of Meat
- Meat Stock (Broth)
- Specialty Recipes
- Vegetable and Meat Soup
- Mincemeat Pie Filling
- Frequently Asked Questions
- Acknowledgements
Introduction
Poultry, red meats, and meat from game animals (such as deer, elk, and bear) are low-acid foods and must be processed in a pressure canner to ensure safety. Because meat and poultry products are low-acid foods, Clostridium botulinum, the bacteria which causes botulism poisoning, can survive and grow in these foods when they are sealed in oxygen free jars. Botulism is a serious food poisoning which can lead to disability or death. Only pressure canning produces temperatures high enough (240°F, 28 degrees above boiling) to kill many bacteria which can grow in low-acid foods, including Clostridium botulinum. If meat products are improperly processed, the botulism toxin could be present even though the canned food looks, smells, and tastes normal.
Put safety first when you prepare and serve home-canned foods. Due to the risk of botulism, never consume low-acid foods that are not canned according to the recommendations in this publication or other USDA-endorsed source. Such foods should be discarded, even if you detect no signs of spoilage.
Safety Checklist
- Select high-quality poultry, meat, and game using only the cuts and preparation steps described in this publication.
- Always can meats and other low-acid foods in a pressure canner. Boiling water canners and steam canners do not produce temperatures high enough to kill botulism-causing bacteria and other spoilage organisms.
- Never can in an oven (electric, gas, wood-burning, or microwave).
- Be sure the dial gauge on your pressure canner is accurate. Have it tested once a year or more often if you do a great deal of canning or drop the lid.
- Each time you use a pressure canner, check to see that the petcock or vent port, and safety valve are not blocked.
- Follow directions exactly for filling jars. Over-packed jars do not heat as evenly as correctly packed jars.
- Always exhaust (remove) air from a pressure canner by venting for 10 minutes before letting pressure build. Cold air trapped in a canner will cause inadequate heating of the jars and under-processing of the food.
- Increase pressure at altitudes above 1,000 feet for weighted-gauge canners or 2,000 feet for dial-gauge canners to reach the proper temperature (240°F) for pressure canning.
- After processing, allow canner to cool naturally. The cool down time is factored into the processing time and organisms continue to be destroyed during this time. Force cooling a canner can result in an unsafe product.
- Never can meat products or combination foods for which you do not have research-based processing times. A safe canning time cannot accurately be determined at home.
Due to the risk of botulism, it is extremely important that meat, poultry, and game be canned according to the USDA-endorsed recommendations in this publication. Follow the procedures or recipes specified for each product precisely.
For an extra measure of safety, boil home-canned meats before eating them. At altitudes below 1,000 feet, boil for 10 minutes; add an additional minute of boiling time for each additional 1,000 feet of elevation.
Selection of Equipment
Pressure Canners
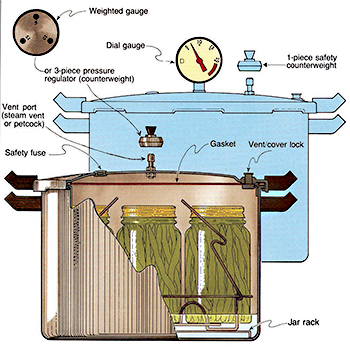
A pressure canner is a specifically designed kettle with a cover that can be clamped or locked down to make the kettle steam tight. It is designed to heat foods at temperatures higher than the boiling water canner. It must be equipped with an accurate pressure gauge to register the steam pressure in the canner.
There are two types of pressure canners: a dial gauge canner and a weighted gauge canner (Figure 1). One manufacturer makes a dual-gauge canner. Read the manufacturer’s instruction manual for information on when and how to use either the dial gauge or the weighted gauge.
A pressure canner must be large enough to hold at least four quart size jars standing upright to be safe for canning. Pressure saucepans are not suitable for canning.
See PNW421 Use, Care and Operation of Your Pressure Canner (link to PDF document) for additional information on pressure canners.
Jars and Lids
Use standard canning (Mason) jars no larger than the size stated in the canning directions for the specific food being canned. Use two-piece metal lids and screw bands. Buy only the quantity of lids you will use in a year or by date on package. Follow the manufacturer’s directions for preparing lids.
Standard canning jars must be used for all pressure-canned foods. Reusing jars from commercial products is not recommended because of increased breakage. Canning jars are manufactured to tolerate the heat of the canning process without breaking.
Preparing Equipment
Inspect jars for cracks and chips and discard damaged ones. Inspect metal screw bands and discard any with dents or rust.
Wash jars, metal screw bands, and lids in hot, soapy water. Rinse well. Keep canning jars hot until ready to use to prevent breakage when they are filled with a hot product and placed into the canner.
Check manufacturer’s directions for preparing lids for use. Don’t reuse lids. Jars may not seal if lids are reused. Spoilage could result if jars don’t seal, and food is wasted.
Before each use, inspect the pressure canner. See that the petcock or vent port, and safety valve are not blocked. Clean them several times a year by drawing a string or pipe cleaner through the openings. Be sure the gasket around the cover fits tightly. For canners with a gasket, replace the gasket if it is loose, stiff, or cracked, or you experience steam leakage. If you have a weighted pressure gauge, keep it clean.
Check dial pressure gauges for accuracy once a year (more often if the canner is used frequently or dropped). It is possible for the dial to read 11 pounds, but not actually be operating at this pressure. If the dial is inaccurate by more than 2 pounds, buy a new one. Have a new gauge tested for accuracy before use. Weighted gauge canners do not need testing.
Your local county Extension office may be able to tell you where gauge testing is available.
Filling Jars
Follow instructions for packing jars. Hot packing of meats and poultry is preferred for best quality, and assuring complete liquid cover. The raw pack option will produce a safe product, but the liquid and fat may not adequately cover the meat or poultry in the jar.
After filling jars with food, release air bubbles by inserting a flat plastic (not metal) spatula between the food and the jar. Slowly turn the jar and move the spatula up and down to allow air bubbles to escape. (You do not need to do this for raw packed meats that have no liquid added to the jar.)
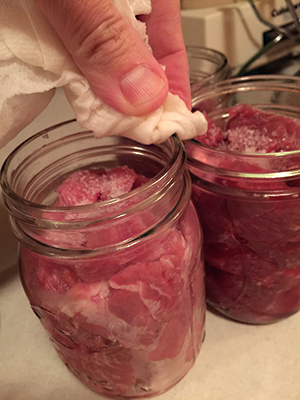
Wipe jar rims with a dampened, clean paper towel. Wiping the rim with a clean paper towel moistened with vinegar will help remove traces of fats from the sealing surface and enhance sealing (Figure 2).
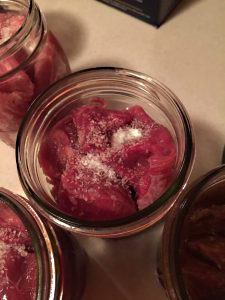
Add salt if desired; it seasons the food but is not necessary for preservation (Figure 3).
Fit the metal screw band over the lid. Follow the manufacturer’s guidelines enclosed with or on the box to tighten the screw bands properly.
Processing in a Pressure Canner
- Read the manufacturer’s directions for use, particularly to check the canner before and during processing and the functions that involve audible hissing, jiggling, or rocking of the weighted gauge.
- Have 2–3 inches of hot water in the canner. For hot-packed foods, water should be 180°F; for raw-packed food, 140°F.
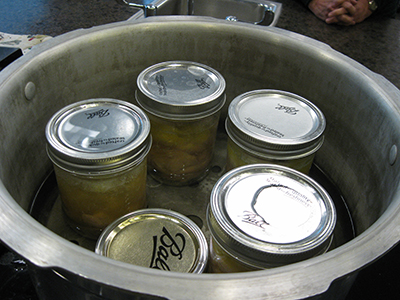
- Arrange jars on a rack so steam can flow freely around each one (Figure 4). Keep jars upright at all times. If a double layer of jars is necessary, use an additional rack to separate the layers. Stagger the placement of the jars over the first group.
- Fasten the canner lid securely so no steam escapes around the rim. Leave the weight off the ventport or open petcock.
- Turn the heat setting on the range to its highest position. Heat until steam flows freely from the ventport or petcock. While maintaining high heat, let steam exhaust continuously for 10 minutes.
- After venting your canner, place the weight on the ventport or close the petcock. The canner will pressurize during the next 3–10 minutes.
- Start timing the process when the pressure reading on the dial gauge indicates the recommended pressure has been reached in a dial gauge canner, or when the weighted gauge begins to jiggle as the manufacturer describes. Use the processing time and pressure that is specified for the product being processed.
- Regulate the heat under the canner to maintain a steady pressure at or slightly above the recommended pressure. Be sure to adjust pressure for altitudes over 1,000 feet if using a weighted gauge canner or 2,000 feet with a dial gauge canner.*
- When the timed process is complete, turn off the heat and remove the canner from heat. Let the canner cool naturally; do not force cooling with water or cold towels.
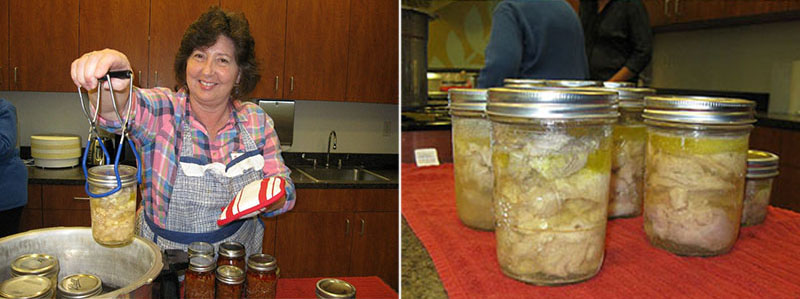
- After the canner is completely depressurized, remove the weight from the ventport or open petcock. Wait 10 minutes to help prevent liquid loss (siphoning) and enhance sealing. Then unfasten the lid and remove it with the underside away from you so that steam does not burn your face.
- Using a jar lifter, remove jars from the canner without tilting them. Set jars on racks or thick towels to minimize heat damage to counters and prevent jar breakage from contact with a cold surface. Do not retighten lids after processing jars.
*If at any time the pressure goes below the recommended level, bring the canner back to pressure by increasing the heat and begin timing the process over, from the beginning, using the original processing time.
Cooling Jars
Allow processed jars to cool undisturbed at room temperature for 12–24 hours. The food level and liquid volume of raw-packed jars will be noticeably lower after cooling because air is exhausted during processing and food shrinks. If a jar loses liquid during processing, do not open it to add more liquid. Jars with liquid loss are safe as long as they were processed properly and are sealed.
Testing the Seal
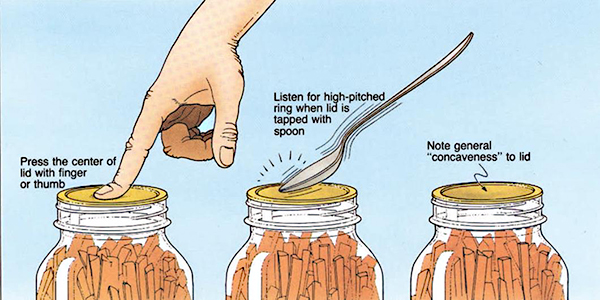
When the jars are cool to the touch (about 12 hours), test each for a seal. Jars with flat, metal lids are sealed if:
- The lid does not move when pressed down (Figure 5).
- Tapping the center of lid with a spoon gives a clear, ringing sound.
- The lid has popped down in the center and there is a concaveness to the lid.
Reprocessing Jars
If a jar is not sealed, refrigerate or freeze the contents; or reprocess within 24 hours of the initial processing. To reprocess, remove the lid and check the jar-sealing surface for tiny nicks. If necessary, change the jar. Add a new, properly prepared lid, and reprocess for the full amount of time. Alternatively, adjust the headspace in unsealed jars to 1½ inches and freeze. Another option is to store single unsealed jars in a refrigerator and consume the contents within several days.
Foods that were processed incorrectly and held over 24 hours should be discarded. Any jars that were originally sealed and come unsealed during storage should be detoxified and discarded. See instructions for disposal of foods and the detoxification process in the section below.
Storage
Wash surfaces of jars. Label with the date and the jar contents, particularly if some batches were packed differently (for example, without salt). Remove screw bands so they do not rust.
Store jars in a cool, dark, dry place. For best quality and nutritive value, use within 1 year. Exposure to heat, freezing temperatures, or light decreases the quality and shelf life of canned food. Canned food stored in indirect sunlight or near warm places like hot pipes, ranges, or furnaces may lose some of its quality in a few weeks or months, depending on the temperature.
Before Use
As you select each jar for use, examine it for signs of spoilage. Holding the jar at eye level, look for streaks of dried food on the outside of the jar. Inside of the jar look for cloudy canning liquid, rising air bubbles, or any unnatural color. While opening the jar, watch for spurting liquid or cotton-like mold growth on food surface or under the lid. Smell for unnatural or off odors. Never taste food from a jar with an unsealed lid or food that shows signs of spoilage.
Disposal
Carefully discard any jar of improperly processed or spoiled food to prevent possible illness to you, your family, or your pets. Spoiled low-acid foods should be treated as having produced botulinum toxin and handled in one of two ways:
- If the suspect jars are still sealed, write on the jar “Poison: Danger. Do Not Eat.” Place the jars in a heavyweight garbage bag. Close and place the bag in a regular trash container or dispose in a nearby landfill.
- If the suspect jars are unsealed, open, or leaking, they should be detoxified before disposal. The detoxification process is necessary to neutralize the botulism toxin, thus eliminating the risk of poisoning to either humans or pets.
Detoxification Procedure
Wear rubber or heavy plastic gloves when handling suspect foods and cleaning up. Remove the jar lids and carefully place the suspect jars on their sides without splashing (along with the lids) in a stock pot, pan, or boiling water canner (8-quart volume or larger). Wash your gloved hands well. Carefully add water until the level is 1 inch above the jars. Put a lid on the pot and heat the water to boiling. Boil for 30 minutes to detoxify the food. Cool and discard the food and lids. Wash the jars and pot.
Spray or wet contaminated surfaces (such as counters and cutting boards) with a household chlorine bleach solution (1 part unscented 5–6% sodium hypochlorite bleach to 5 parts clean room temperature water) and let stand for 30 minutes. Wipe up treated spills with paper towels and put them in a plastic bag before discarding in the trash. Rinse surfaces.
Soak metal utensils in a mild chlorine solution (1 teaspoon bleach to 1 quart room temperature water) for 30 minutes; rinse.
Procedures for Canning Meat, Poultry, and Game
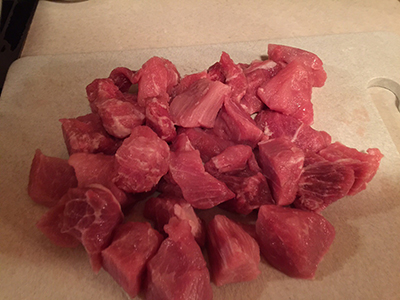
The procedures and processing information described below apply only to fresh meat and poultry products (Figure 6). The processing recommendations do not apply to cured, brined, smoked, or corned meats or poultry products. Do not attempt to can these products. Freezing is a safe alternative.
Tips for Quality Canned Meat
- Use only good quality poultry, red meat, and wild game for canning.
- Chill meat soon after slaughter to 40°F or lower to keep it from spoiling.
- If you are not able to can the meat within a few days of slaughter, freeze it. Keep frozen until you’re ready to can it, and then thaw in a refrigerator.
- Keep all work areas clean and sanitary.
- Trim gristle, bruised spots, and fat off meat before canning.
- Trim excess fat from meat before canning. Fat left on meat will melt and climb the sides of the jar during processing. If the fat comes in contact with the sealing edge of the lid, the jar may not seal.
Poultry or Rabbit
(Poultry includes Chicken, Duck, Goose, Turkey, and Game Birds)
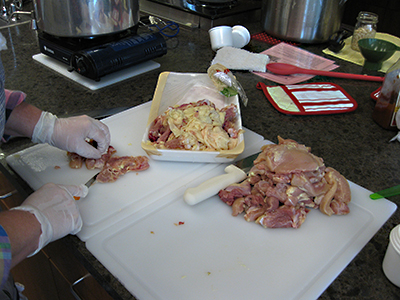
Choose freshly killed and dressed animals. Large chickens are more flavorful than fryers. Dressed chicken should be chilled 6–12 hours before canning. Soak dressed rabbits and strong flavored game birds (especially water fowl) for 1 hour in water containing 1 tablespoon of salt per quart and then rinsed. Remove excess fat. Cut the poultry or rabbit into suitable sizes for canning (Figure 7). Can with or without bones.
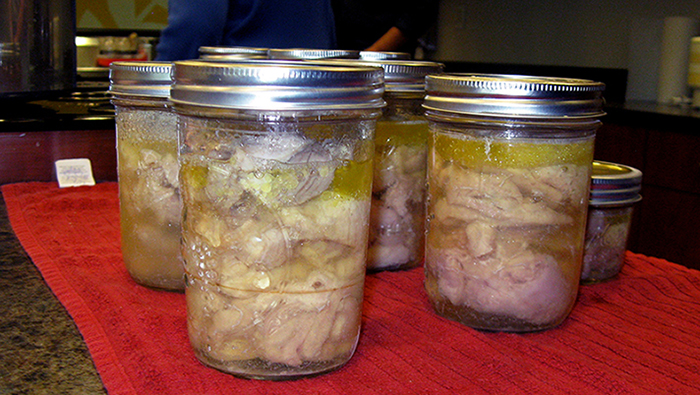
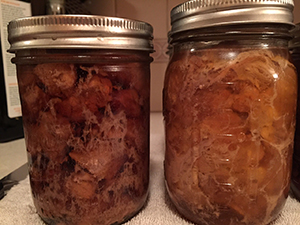
The hot pack is preferred for best liquid cover and quality during storage. Natural poultry fat and juices may not be adequate to cover the meat in raw packs (Figure 8).
Hot pack
Boil, steam, or bake meat until about two-thirds done. If desired, add 1 teaspoon salt per quart, for taste. Fill hot jars with pieces of meat and hot broth, leaving 1¼ inch headspace. Remove air bubbles and adjust headspace if needed.
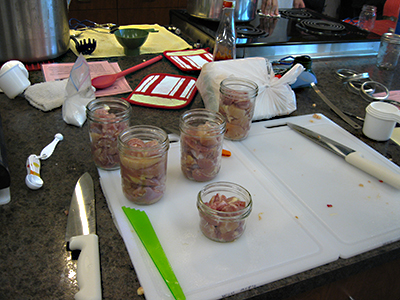
Raw pack
Add 1 teaspoon salt per quart, if desired, for taste. Fill hot jars loosely with raw meat pieces, leaving 1¼ inch headspace. Do not add liquid (Figure 9).
Wipe jar rims with a dampened, clean paper towel. Adjust lids and process according to type of pressure canner.
Processing times for Poultry or Rabbit in a dial-gauge pressure canner.| Style of pack | Jar size | Process time | Canner Pressure (PSI) at Altitudes of 0–2000 ft | Canner Pressure (PSI) at Altitudes of 2001–4000 ft | Canner Pressure (PSI) at Altitudes of 4001–6000 ft | Canner Pressure (PSI) at Altitudes of 6001–8000 ft |
|---|---|---|---|---|---|---|
| Without bones | ||||||
| Hot and raw | Pints | 75 min | 11 lbs | 12 lbs | 13 lbs | 14 lbs |
| Quarts | 90 min | 11 lbs | 12 lbs | 13 lbs | 14 lbs | |
| With bones | ||||||
| Hot and raw | Pints | 65 min | 11 lbs | 12 lbs | 13 lbs | 14 lbs |
| Quarts | 75 min | 11 lbs | 12 lbs | 13 lbs | 14 lbs | |
| Style of pack | Jar size | Process time | Canner Pressure (PSI) at Altitudes of 0–1000 ft | Canner Pressure (PSI) at Altitudes above 1000 ft |
|---|---|---|---|---|
| Without bones | ||||
| Hot and raw | Pints | 75 min | 10 lbs | 15 lbs |
| Quarts | 90 min | 10 | 15 | |
| With bones | ||||
| Hot and raw | Pints | 65 min | 10 lbs | 15 lbs |
| Quarts | 75 min | 10 | 15 | |
Ground or Chopped Meat
(Includes: bear, beef, buffalo, lamb, mutton, pork, sausage, veal, and venison)
Choose fresh, chilled meat. With venison, add 1 part high-quality pork fat to 3 or 4 parts venison before grinding. Use freshly made seasoned sausage (season with salt and cayenne pepper; sage may cause a bitter off-flavor). Shape chopped meat into patties or balls or cut cased sausage into 3–4-inch links.
Cook until lightly browned. Ground meat may be sautéed without shaping. Remove excess fat. Fill hot jars with meat pieces. Add boiling meat broth, tomato juice, or water, leaving 1 inch headspace. If desired, add 1 teaspoon of salt per quart to the jars, for taste. Remove air bubbles and adjust headspace, if needed. Wipe jar rims with a dampened, clean paper towel. Adjust lids and process according to type of pressure canner.
Processing times for Ground or Chopped Meat in a dial-gauge pressure canner.| Style of pack | Jar size | Process time | Canner Pressure (PSI) at Altitudes of 0–2000 ft | Canner Pressure (PSI) at Altitudes of 2001–4000 ft | Canner Pressure (PSI) at Altitudes of 4001–6000 ft | Canner Pressure (PSI) at Altitudes of 6001–8000 ft |
|---|---|---|---|---|---|---|
| Hot | Pints | 75 min | 11 lbs | 12 lbs | 13 lbs | 14 lbs |
| Quarts | 90 min | 11 | 12 | 13 | 14 |
| Style of pack | Jar size | Process time | Canner Pressure (PSI) at Altitudes of 0–1000 ft | Canner Pressure (PSI) at Altitudes of above 1000 ft |
|---|---|---|---|---|
| Hot | Pints | 75 min | 10 lbs | 15 lbs |
| Quarts | 90 min | 10 | 15 |
Strips, Cubes, or Chunks of Meat
(Includes: bear, beef, buffalo, lamb, pork, veal, and venison)
Choose quality, chilled meat. Remove excess fat. Soak strong-flavored wild meats for 1 hour in brine containing 1 tablespoon of salt per quart of water. Rinse. Remove large bones.
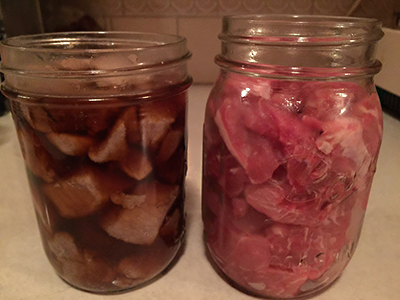
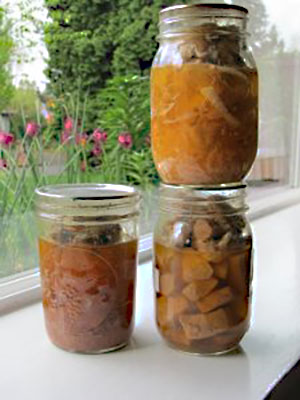
The hot pack is preferred for best liquid cover and quality during storage. The natural amount of fat and juices in today’s leaner meat cuts may not be adequate to cover the meat in raw packs (Figures 10, 11, and 12).
Hot pack
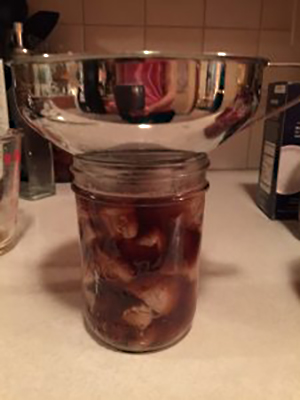
Precook meat until rare (internal temperature 120–125°F.) by roasting, stewing, or browning in a small amount of fat. If desired, add 1 teaspoon of salt per quart to the jar, for taste. Fill hot jars with pieces and add boiling broth, meat drippings, water, or tomato juice (especially with wild game), leaving 1 inch headspace. Remove air bubbles and adjust headspace, if needed (Figure 13).
Raw pack
Add 1 teaspoon of salt per quart to the jar if desired, for taste. Fill hot jars with raw meat pieces, leaving 1 inch headspace. Do not add liquid.
Wipe jar rims with a dampened, clean paper towel. Adjust lids and process according to type of pressure canner.
Processing times Strips, Cubes, or Chunks of Meat in a dial-gauge pressure canner.| Style of pack | Jar size | Process time | Canner Pressure (PSI) at Altitudes of 0–2000 ft | Canner Pressure (PSI) at Altitudes of 2001–4000 ft | Canner Pressure (PSI) at Altitudes of 4001–6000 ft | Canner Pressure (PSI) at Altitudes of 6001–8000 ft |
|---|---|---|---|---|---|---|
| Hot and Raw | Pints | 75 min | 11 lbs | 12 lbs | 13 lbs | 14 lbs |
| Quarts | 90 min | 11 | 12 | 13 | 14 |
| Style of pack | Jar size | Process time | Canner Pressure (PSI) at Altitudes of 0–1000 ft | Canner Pressure (PSI) at Altitudes of above 1000 ft |
|---|---|---|---|---|
| Hot and Raw | Pints | 75 min | 10 lbs | 15 lbs |
| Quarts | 90 min | 10 | 15 |
Meat Stock (Broth)
Beef:
Saw or crack fresh trimmed beef bones (with meat removed) to release their flavor. Rinse bones and place in a large stockpot or kettle. Cover bones with water. Place cover on pot, and simmer 3–4 hours. Remove bones, cool broth. Skim off excess fat and discard. If desired, remove any tiny amount of meat tidbits still clinging to bones and add back to the broth. Reheat broth to boiling. Fill hot jars, leaving 1 inch headspace. Wipe jar rims with a dampened, clean paper towel. Adjust lids and process according to type of pressure canner.
Chicken or turkey:
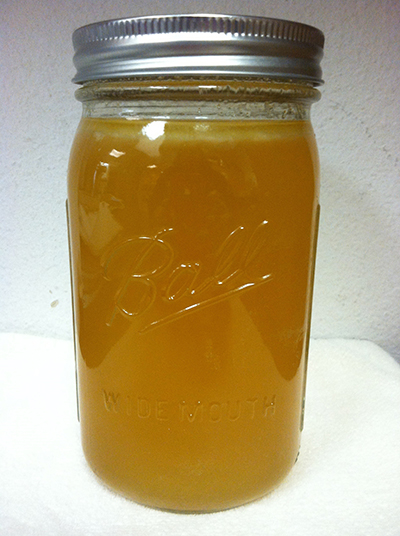
Place large carcass bones (with meat removed) in a large stockpot. Add enough water to cover bones. Cover pot and simmer 30–45 minutes or until any remaining tidbits of meat on bones easily fall off. Remove bones, cool broth and discard excess fat. If desired, remove any tiny amount of meat trimmings still clinging to bones and add back to the broth. Reheat broth to boiling and fill jars, leaving 1-inch headspace. Wipe rims of jars with a dampened, clean paper towel. Adjust lids and process according to type of pressure canner (Figure 14).
Process times for Strips, Cubes, or Chunks of Meat in a weighted-gauge pressure canner.| Style of pack | Jar size | Process time | Canner Pressure (PSI) at Altitudes of 0–1000 ft | Canner Pressure (PSI) at Altitudes of Above 1000 ft |
|---|---|---|---|---|
| Hot and Raw | Pints | 75 min | 10 lbs | 15 lbs |
| Quarts | 90 min | 10 | 15 |
| Style of pack | Jar size | Process time | Canner Pressure (PSI) at Altitudes of 0–2000 ft | Canner Pressure (PSI) at Altitudes of 2001-4000 ft | Canner Pressure (PSI) at Altitudes of 4001-6000 ft | Canner Pressure (PSI) at Altitudes of 6001-8000 ft |
|---|---|---|---|---|---|---|
| Hot | Pints | 20 min | 11 lbs | 12 lbs | 13 lbs | 14 lb |
| Quarts | 25 min | 11 | 12 | 13 | 14 |
| Style of pack | Jar size | Process time | Canner Pressure (PSI) at Altitudes of 0–1000 ft | Canner Pressure (PSI) at Altitudes of above 1000 ft |
|---|---|---|---|---|
| Hot | Pints | 20 min | 10 lbs | 15 lbs |
| Quarts | 25 min | 10 | 15 |
Specialty Recipes
Chili Con Carne
3 cups dried pinto or red kidney beans
5 teaspoons salt (separated)
1½ cups chopped onion
1 cup chopped peppers of your choice (optional)
2 quarts crushed or whole tomatoes
5½ cups water
3 pounds ground beef
1 teaspoon black pepper
3–6 tablespoons chili powder
Wash beans thoroughly and place them in a 2-quart saucepan. Add cold water until it is 2–3 inches above the beans and soak 12–18 hours. Drain and discard water. Combine beans with 5½ cups of fresh water and 2 teaspoons salt. Bring to a boil. Reduce heat and simmer 30 minutes. Drain and discard water.
Brown ground beef, chopped onions, and peppers (if desired), in a skillet. Drain off fat and add 3 teaspoons salt, pepper, chili powder, tomatoes, and drained cooked beans. Simmer 5 minutes.
Caution: Do not add thickeners before canning.
Yield: 9 pints
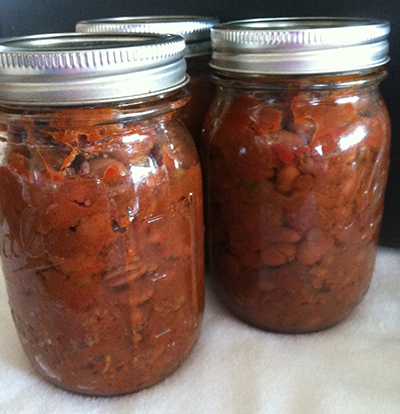
Fill hot pint jars, leaving 1 inch headspace. Remove air bubbles and adjust headspace if needed. Wipe jar rims with a dampened clean paper towel. Adjust lids and process for the recommended time according to type of pressure canner (Figure 15).
Processing times Chile Con Carne in a dial-gauge pressure canner.| Style of pack | Jar size | Process time | Canner Pressure (PSI) at Altitudes of 0–2000 ft | Canner Pressure (PSI) at Altitudes of 2001–4000 ft | Canner Pressure (PSI) at Altitudes of 4001–6000 ft | Canner Pressure (PSI) at Altitudes of 6001–8000 ft |
|---|---|---|---|---|---|---|
| Hot | Pints | 75 min | 11 lbs | 12 lbs | 13 lbs | 14 lbs |
| Style of pack | Jar size | Process time | Canner Pressure (PSI) at Altitudes of 0–1000 ft | Canner Pressure (PSI) at Altitudes of above 1000 ft |
|---|---|---|---|---|
| Hot | Pints | 75 min | 10 lbs | 15 lbs |
Vegetable and Meat Soup
Select, wash, and prepare dried beans or peas, meat or poultry, and vegetables individually as directed below.
Caution: Do not add noodles or other pasta, rice, flour, cream, milk, or other thickening agents to home canned soups. If dried beans or peas are used, they must be fully rehydrated first.
Dried beans or peas: For each cup of dried beans or peas, add 3 cups of water. Boil 2 minutes, remove from heat, and soak 1 hour. Reheat to boiling. Drain.
Meat or poultry: Cover with water and cook until tender. Cool meat and remove bones.
Vegetables: All vegetables should be prepared as you would for canning a ‘hot pack’ according to USDA directions.
Combine meat or poultry, vegetables, and drained beans or peas. Add sufficient broth, canned tomatoes, water, or a combination to cover. Caution: Do not thicken. Boil 5 minutes. Salt to taste, if desired.
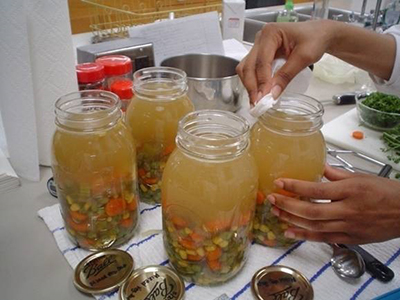
Fill jars halfway with solid mixture. Add remaining liquid, leaving 1 inch headspace. Wipe jar rims with a dampened clean paper towel. Adjust lids and process according to type of pressure canner.
| Style of pack | Jar size | Process time | Canner Pressure (PSI) at Altitudes of 0–2000 ft | Canner Pressure (PSI) at Altitudes of 2001–4000 ft | Canner Pressure (PSI) at Altitudes of 4001–6000 ft | Canner Pressure (PSI) at Altitudes of 6,001–8000 ft |
|---|---|---|---|---|---|---|
| Hot | Pints | 60 min | 11 lbs | 12 lbs | 13 lbs | 14 lbs |
| Quarts | 75 min | 11 | 12 | 13 | 14 |
Note: Processing time is 100 minutes if soup contains seafood.
Recommended process time for Soups in a weighted-gauge pressure canner.| Style of pack | Jar size | Process time | Canner Pressure (PSI) at Altitudes of 0–1000 ft | Canner Pressure (PSI) at Altitudes of above 1000 ft |
|---|---|---|---|---|
| Hot | Pints | 60 min | 10 lbs | 15 lbs |
| Quarts | 75 min | 10 | 15 |
Note: Processing time is 100 minutes if soup contains seafood. Add thickening agents or additional ingredients when jars are opened and soup is being prepared to serve.
Mincemeat Pie Filling
2 cups finely chopped suet
4 pounds ground beef or ground venison
7–8 pounds apples (5 quarts chopped apples)
2 pounds dark seedless raisins
1 pound white raisins
2 quarts apple cider
2 tablespoons ground cinnamon
2 teaspoons ground nutmeg
5 cups sugar
1 tablespoon salt
Cook meat and suet in water to avoid browning. Peel, core, and quarter apples. Put meat, suet, and apples through food grinder using a medium blade. Combine all ingredients in a large saucepan, and simmer 1 hour or until slightly thickened. Stir often. Fill hot jars with mixture without delay, leaving 1 inch headspace. Remove air bubbles and adjust headspace, if needed. Wipe jar rims with a dampened clean paper towel. Adjust lids and process according to type of pressure canner.
Yield: About 7 quarts
Processing time for Mincemeat Pie Filling in a dial-gauge pressure canner.
| Style of pack | Jar size | Process time | Canner Pressure (PSI) at Altitudes of 0–2000 ft | Canner Pressure (PSI) at Altitudes of 2001–4000 ft | Canner Pressure (PSI) at Altitudes of 4001–6000 ft | Canner Pressure (PSI) at Altitudes of 6,001–8000 ft |
|---|---|---|---|---|---|---|
| Hot | Quarts | 90 min | 11 lbs | 12 lbs | 13 lbs | 14 lbs |
| Style of pack | Jar size | Process time | Canner Pressure (PSI) at Altitudes of 0–1000 ft | Canner Pressure (PSI) at Altitudes of above 1000 ft |
|---|---|---|---|---|
| Hot | Quarts | 90 min | 10 lbs | 15 lbs |
Frequently Asked Questions
Why is it necessary to remove as much fat from meat as possible before canning?
Fat left on meat will climb up the sides of a jar during processing and may prevent sealing.
Is it safe to can meat that has been frozen?
Yes, but it must be thawed first. Thaw meat in a refrigerator until no ice crystals remain. Plan to process within two days of thawing.
Can I use the chili con carne processing times listed here for my personal chili con carne recipe?
A published processing time is specific to that food, and any variation that alters pH, consistency, texture, distribution of solids and liquids is a new product. The processing time for chili con carne in this publication is only for the corresponding recipe. Freezing is a safe alternative for preserving recipes that deviate from the ones developed and tested for home canning.
Is it safe to can other animal products such as butter and cheese?
There has been no testing of these products for safety. Food scientists are concerned that the processes being described on internet sites are not sufficient to destroy the bacteria that can cause botulism poisoning.
Can two layers of jars be processed in a pressure canner at one time?
Yes, if your canner is tall enough you can process two layers of jars in a pressure canner. Place a small wire rack between the layers so steam can circulate around each jar.
To can a mixture of foods, don’t I just need to look up all of the processing times and go by the longest ingredient in the mixture?
The belief that it is acceptable to process food mixtures for the time required by the ingredient with the longest processing time is not accurate. Food scientists cannot predict the equilibrium pH and heat transfer characteristics of a mixture of different foods. Thus, the processing times determined on individual products are no longer accurate once the food is put into a combination with other foods.
Either freeze these products or process the products individually and mix them together upon opening, during preparation for eating.
I want to prepare “one-jar meals” like I see in the grocery store. How do I determine a processing time for those?
There are a wide variety of canned or bottled foods available commercially that do not have a home canning counterpart. Testing recipes for home canning is a time consuming and costly endeavor. Commercial food companies have a research and development department, and funds dedicated for creating and testing new recipes for quality and safety. Freezing is always a safe alternative when processing times are not available.
Why doesn’t this guide include a recipe for home-canned meat stew?
USDA does not have tested recipes for home canned meat stew. A thick food-like stew is risky to process because the heat penetration varies greatly depending on the consistency. A safe alternative would be to prepare the Vegetable and Meat Soup in this booklet. After you open the jar, you could safely thicken it by adding cornstarch before heating.
Acknowledgements
Adapted from Complete Guide to Home Canning, USDA Agricultural Information Bulletin 539, 2014.
Originally compiled in 1999 by Val Hillers, Washington State University Extension Food Specialist. Updated in 2010 by Lizann Powers-Hammond, WSU Extension Area Educator; and Karen Killinger, WSU Extension Food Safety Specialist. Reviewed in 2010 by; Sandra McCurdy, University of Idaho Food Safety Specialist; and Carolyn Raab, Oregon State University Extension Food and Nutrition Specialist.
Author:
Lizann Powers-Hammond, MS, CN, Benton County Extension,
Washington State University

PNW361
Published and distributed in furtherance of the Acts of Congress of May 8 and June 30, 1914, by Washington State University Extension, Oregon State University Extension Service, University of Idaho Extension, and the U.S. Department of Agriculture cooperating. WSU Extension programs, activities, materials, and policies comply with federal and state laws and regulations on nondiscrimination regarding race, sex, religion, age, color, creed, and national or ethnic origin; physical, mental, or sensory disability; marital status or sexual orientation; and status as a Vietnam-era or disabled veteran. Washington State University Extension, Oregon State University Extension Service, and University of Idaho Extension are Equal Opportunity Employers. Evidence of noncompliance may be reported through your local Extension office. Trade names have been used to simplify information; no endorsement is intended.
Pacific Northwest Extension publications contain material written and produced for public distribution. You may reprint written material, provided you do not use it to endorse a commercial product. Please reference by title and credit Pacific Northwest Extension publications.
Order Information:
WSU Extension
Fax: 509-335-3006
Toll-free phone: 800-723-1763
Email: ext.pubs@wsu.edu
OSU Extension
Fax: 541-737-0817
Toll-free phone: 800-561-6719
Email: puborders@oregonstate.edu
UI Extension
Fax: 208-885-4648
Phone: 208-885-7982
Email: calspubs@uidaho.edu
Copyright © Washington State University
Pacific Northwest Extension publications are produced cooperatively by the three Pacific Northwest land-grant universities: Washington State University, Oregon State University, and the University of Idaho. Similar crops, climate, and topography create a natural geographic unit that crosses state lines. Since 1949, the PNW program has published more than 650 titles, preventing duplication of effort, broadening the availability of faculty specialists, and substantially reducing costs for the participating states.