Getting to the Point: How to do a 4-H Public Presentation
Description
Tips for demonstrations, illustrated talks, presentations, and how to get your message across. ...4-H public presentations are divided into three general categories:
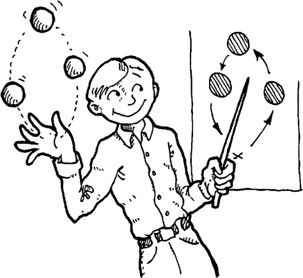
- Demonstrations.
A demonstration puts words into action by telling others how to do something while you are actually doing it. At the end of a demonstration you should have a finished product to show your audience, and they should be able to create their own similar product or perform the service you have demonstrated. - Illustrated talks.
Illustrated talks require you to use a series of posters, pictures, graphics, or other visual aids to show how to do something or illustrate a process. While visuals must be used in an illustrated talk, no finished product is required. - Persuasive speech.
In a persuasive speech you take a point of view on a topic and attempt to convince others to share that same point of view. No visuals of any sort may be used, so you must rely solely on the power of your voice and physical presence (including gestures) to change minds and capture the attention of your audience.
General Considerations
All of these formats offer excellent opportunities for you to speak effectively before groups. Your age, skills, experiences, and the amount of time you have available to prepare and practice should be major considerations when deciding what kind of public presentation is most appropriate for the topic you are addressing. The information you have to communicate and how you plan to present it are also important when determining the best format. All types of public presentations should be interesting, worthwhile, and appropriate for your audience.
Whatever format you choose (demonstration, illustrated talk, or persuasive speech), you will:
- Learn to speak more easily before groups
- Learn organization through preparation
- Learn to describe vividly
Remember that visuals for both demonstrations and illustrated talks require planning and organization to be interesting, attractive, and effective in communicating your message.
Some reasons to choose an illustrated talk instead of a demonstration include:
- Size of project is either too large or too small to display during a demonstration
- Subject requires development over months or years
- Demonstration time is too short to complete a finished product
- Animals necessary to the presentation might be frightened by an audience or too large to use with a group.
Individual vs. Team Demonstrations and Illustrated Talks
Demonstrations and illustrated talks can be given by individuals or teams of two members. Both ways have merit. When trying to decide which of the formats you want to participate in, ask yourself, “Can I do this best by myself or with someone else?”
All presentations should be flexible, but fitted to both the topic and circumstances. Compared to a team presentation, planning and giving an individual presentation is less time-consuming and complex.
However, team presentations are a good way to learn teamwork and cooperation. They also have the advantage of allowing each team member to gain experience by being responsible for a portion of the total presentation, which at the same time gives the viewing audience a change of voices and personalities. Additionally, an extra pair of hands provides an opportunity to tackle a more complex technique or subject for demonstration.
Teamwork is encouraged throughout the presentation so that each member has an equal distribution of labor and speaking. Shifting the presentation from one team member to another should occur at natural intervals.
A persuasive speech cannot be given by a team—it is solely an individual activity.
Getting Ready to Present
Because it is impossible to show and tell everything there is to know about a subject during a presentation, be prepared to answer questions that your audience and/or judges may ask.
Choose one main idea or theme to dominate your presentation, and remember that it must be demonstrated or illustrated in the allocated time (see recommended time limits to the right). Also take into account the physical facilities needed and available when choosing your subject.
The title of your presentation should generate excitement within your audience about your topic, so be creative. For example, if you are doing a demonstration on solar cell robotics, “Light into Action!” is likely to interest more people than “Using Solar Powered Microchips to Power Robotic Cars.”
Recommended Time Limits for Persuasive Speeches
- Minimum 5 minutes
- Maximum 15 minutes
Recommended Time Limits for Illustrated Talks and Demonstrations
- Minimum 3 minutes
- Maximum 20 minutes, with the following guidelines:
- Juniors: 3–8 minutes
- Intermediates: 5–15 minutes
- Seniors: 8–20 minutes
Shaping Your Illustrated Talk or Demonstration
Prepare a written outline of the three main parts of your presentation:
1. Introduction—the “why”
Keep this brief, original, and a follow-up to the title. Tell why the topic was selected. Make your audience feel that the subject is important to you and them. Be sure to introduce yourself if that has not already been done by the master of ceremonies.
2. Body—the “show and tell”
Ask yourself the following questions when you prepare the show-and-tell portion of your demonstration or illustrated talk:
- What are the necessary steps to carry out the presentation?
- What is the logical order of things that I should do in the presentation?
- What should I say to explain the order of events?
- What materials do I need to do the presentation?
- Can I use posters or other visual aids to illustrate the presentation and stress the main points in a clear and effective way? If so, what types are available and would work best?
The body of your presentation should show and explain the steps in the process you are illustrating. Develop the central idea as each step is presented. Tell what is being done and why you are using a particular method. For example, a demonstration on how to make a blouse using French seams on very thin fabric should include explanation that French seams enclose raw edges, prevent them from raveling, and make the finished garment more pleasing to the eye.
Design explanations to fill the action time, and use your own words. Memorizing material is not recommended. However, since presentations are somewhat formal, avoid personalizing the explanations. Continuing our sewing illustration, “French seams are best because…” is preferable phrasing to “You should use French seams.” Also, be sure to speak in complete sentences throughout your explanations.
Use proper equipment for the job at hand, and show skill in operating it. Work for simplicity and attractiveness, which includes keeping your demonstration area tidy. Build your presentation up to a peak.
Some demonstrations pose special problems such as long intervals between steps or a complex multi-step process. You can avoid such lulls by having the items or product available at various stages of development. For example, show dinner rolls at the preparation and completion stages. (Obviously this is work you will need to accomplish in advance of your presentation.)
3. Summary—the “wrap-up”
This is your last chance to get your message across. Confine your summary to the key points of your presentation that you want the audience to remember. This means ways the topic can be valuable to them. Never introduce new material in the summary or restate your entire presentation.
Be prepared to answer questions. The audience may have missed some point or a step of the presentation. Or they may want to test your knowledge. When a question is asked, ensure that the entire audience knows what the question was by repeating it or incorporating it into the answer.
If questions are asked that you can’t answer, don’t worry. Simply say you don’t know the answer, but will look into it. Unless the presentation is a contest, you may even ask the audience to help with answers.
When there are no more questions, thank the audience for their time and attention and invite them to sample and/or inspect the finished product. Having copies of recipes or some sort of handout available for the audience is a popular gesture.
Practical Hints
When preparing your presentation, follow these guidelines to add polish to your demonstration or illustrated talk:
Setting up
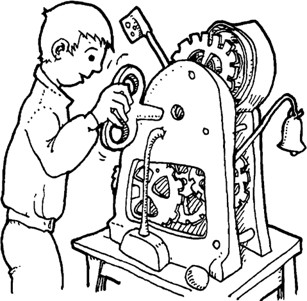
- Arrange and choose equipment and supplies so the audience can see the materials and the process (e.g., use glass bowls).
- Place extra equipment on a second table away from the demonstration table.
- Use trays to group your supplies and equipment for easier access and neatness.
- Label containers clearly and be sure they are visible to the audience.
- Keep cloth or paper towels handy, and attach a paper bag to the demonstration table for waste if needed.
- Use racks to display garments on hangers.
- Number the backs of posters for easy identification when using several of identical size and color.
- Keep poster boards the same size.
- Practice flipping posters over easily and smoothly if you use both sides.
What to wear
Make a positive first impression by observing the following dress code:
- Choose simple, practical clothing so that your audience will be attracted to your demonstration, and not distracted by your clothes. Team members might want to dress alike.
- Make sure your hands and fingernails are clean and well kept.
- Keep jewelry and makeup to a minimum.
Visuals
Use visuals to enhance your demonstration or illustrated talk, but keep in mind these aids need to be chosen carefully and made clearly and neatly or they will make the presentation worse.
Simple, well-prepared visuals help audiences learn faster, understand better, and remember longer. Visuals may be used to introduce the demonstration, present the main points, and/or give the summary.
When using visuals, keep these points in mind:
- Use large lettering, generally at least 2 inches in height so that people can easily read them.
- Keep them simple with only one major point per poster.
- Remove them as soon as you have made your point.
- Blend them in with your demonstration.
- Clarify who made any DVDs, CDs, or PowerPoints. Be sure to specify what is your own work and what is the work of others.
- Confine any visuals/products you or your teammate did not personally make to a minor part of the presentation.
You Are On!

Most people remember what they see rather than what they hear, so the way you make your presentation is critical.
Practice enables you to give an effective presentation because you will be familiar with the subject and can therefore focus on your delivery and avoid hurrying.
Poise and confidence are also important factors in a successful presentation. The following tips will help you convey this image during your talk:
- Begin with a smile to communicate to your audience that you want to share your ideas with them.
- Look at the audience.
- Stand steady on your feet. Don’t rock back and forth.
- Don’t swing your arms wildly, but do use gestures as appropriate.
- Show enthusiasm for your subject.
- Talk directly to the audience in a clear, conversational tone (not too soft and not too loud).
- Continue with your presentation and explain what happened if you goof. Mistakes happen to everyone, so don’t allow this to make you nervous.
- Act and look like you enjoy presenting. Motivate the audience to want to do what you are doing.
- Weave personal experience into your presentation.
- Keep notes available, but never read from them or rely on them too heavily.
Review this manual in its entirety and keep the guidelines in mind as you select a topic area, theme, and title for your presentation; develop them into a beginning, middle, and end; and practice. You will emerge as an effective communicator.
To learn more about the specifics of persuasive speeches, use EM4903E, Public Speaking 4-H Member Manual.

WSU EXTENSION 4-H YOUTH DEVELOPMENT PROGRAM
WSU Extension bulletins contain material written and produced for public distribution. Alternate formats of our educational materials are available upon request for persons with disabilities. Please contact Washington State University Extension Communications and Educational Support for more information.
You may order copies of this and other publications from WSU Extension Publications or call 1-800-723-1763.
Issued by Washington State University Extension and the U.S. Department of Agriculture in furtherance of the Acts of May 8 and June 30, 1914. WSU Extension programs and policies are consistent with federal and state laws and regulations on nondiscrimination regarding race, sex, religion, age, color, creed, national or ethnic origin; physical, mental, or sensory disability; marital status, sexual orientation; and status as a Vietnam-era or disabled veteran. Evidence of noncompliance may be reported through your local WSU Extension office. Trade names have been used to simplify information; no endorsement is intended. Revised August 2007. Subject codes 800 and 839.